

Halloween Centerpiece
- Epiphany Crafts: Round 14 Shape Studio, Round 14 Bubble Caps, Round 20 Button Studio, Round 20 Buttons, Square 25 Shape Studio, Square 25 Bubble Caps, Metal Charm Settings, Cabana Vintage Settings.
- Blue Mood Beads Jump Rings
- Hydrangea Hippo Triple Pearl Stick Pins, Round Top Stick Pins, Faceted White Bead, Lace, Ribbon
- Cosmo Cricket Haunted Halloween Ribbon & Acrylic Stamp Set
- May Arts Ribbon, Pom Trim
- Pink Paislee Decorative Tape
- Patterned Paper by Bo Bunny Press, Cosmo Cricket, October Afternoon
- American Crafts Foil Metallic Cardstock
- Clearsnap Design Adhesives, Glitter in Charcoal, ColorBox Archival Dye Ink in Wicked Black, Smooch Spritz in Silver Foil, Carrot Cake, and Black Velvet
- Faux Pumpkins by Michael's Crafts Stores, Dollar Tree, Target Stores
- Darice Googly Eyes
- Dollar Tree Faux Black Netting
- Martha Stewart Starburst Punch
- Bombay Company Candlesticks
- Parylite Candles
- Crate & Barrel Round Placemats
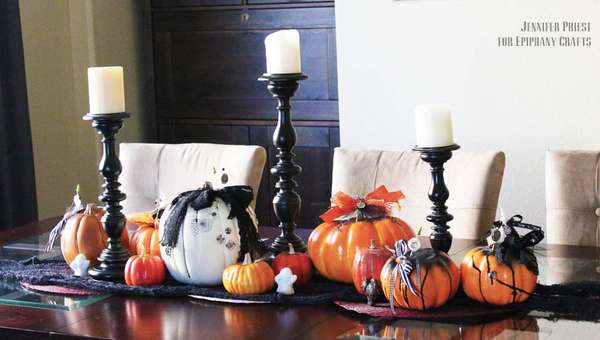
I created this centerpiece for my dining room table using faux pumpkins purchased at Dollar Tree, the $1 bin at Target and two from Michael's on sale. I embellished them with buttons, charms, and Vintage Settings created with Epiphany Crafts Shape and Button Studios and scraps of paper. This entire centerpiece cost under $20!! I repurposed some household decor items to add to the look and those were not included in the cost.
Instructions:
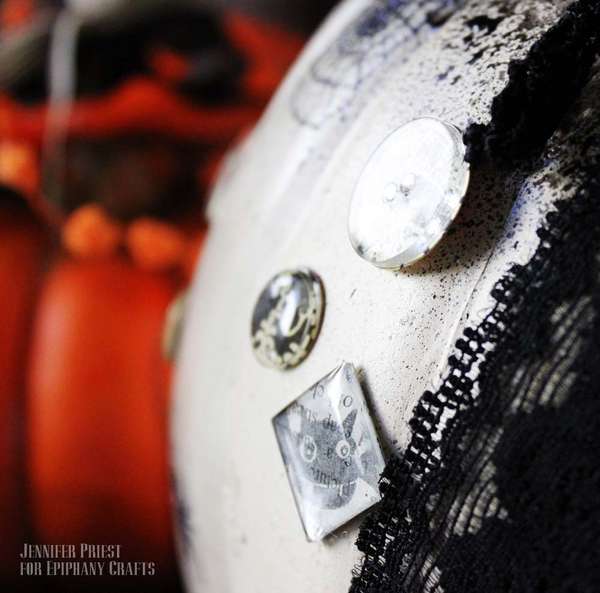
Apply Design Adhesives and glitter to the two largest pumpkins for a design element. Then spray the tops of the medium pumpkins with Smooch Spritz spray ink and allow it to drip.
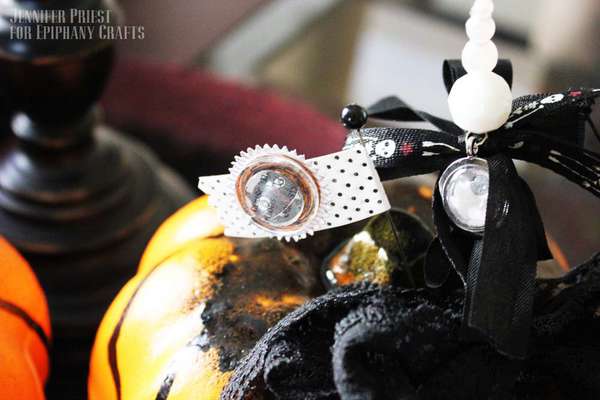
Next, layer ribbons, tulle, and trims to make bows to adorn the tops of the pumpkins. Add stick pins with decorative tape flags and starburst circle shapes.
Stamp bats and eyeballs onto scraps of paper and made them into epoxy embellishments using the Epiphany Crafts Round 14 Shape Studio and coordinating Bubble Caps. Then create buttons from Orange patterned paper scraps using the Epiphany Crafts Round 20 Buttons Studio and coordinating Buttons. Mount the epoxies to the tops of the buttons for a dimensional embellishments to add to the flags and stick pins I stuck in the tops of some of the pumpkins.
I created two eyeball charms using the Epiphany Crafts Charm Settings and the eyeballs I created with the Epiphany Crafts Round 14 Shape Studio. I attached these to the pumpkins using jump rings.
I then created black and white Buttons and Shapes using the Epiphany Crafts Round 14 Shape Studio and Round 20 Button Studio and added them in clusters to the large white pumpkin. I then stamped bats onto patterned paper and created Square 25 Epoxies using the Epiphany Crafts Square 25 Shape Studio. I aligned the bats so they would be diagonal in the square, creating a diamond, and then mounted these to the white pumpkin as well.
I added several Cabana Vintage Settings by Epiphany Crafts to the pumpkins, adding googly eyes to the centers.
Place three round placemats along the center of the table and spread a piece of black spooky netting over top. Add candlesticks from my bookcase and then arranged the decorated pumpkins among the candlesticks. Fill in any in the gaps with mini pumpkins for a beautiful table top decoration!
Just wanted to say that your work is amazing, and I really appreciate the detailed instructions!
beautiful pumpkins!