Oh it is that wonderful time of year, the time when we know the year is halfway done and the holidays will be here before we know it! With the summer heat, the last thing you probably are thinking about is snowflakes and sledding but I find this is a great time to get started on those holiday projects. December 24th will be here sooner than we all plan on it!
Several of my friends have organized “Christmas in July” Card Camps which are tons of a fun and a great way to get ahead on your holiday projects. Dress in your finest Christmas sweater, bring warm apple cider and gingerbread cookies to the potluck, and spend the day stamping snowflakes and “Warm Winter Wishes” as you get all of your Christmas Cards created.
I like to have my family make their holiday wish lists now. It helps my budget but also, it helps me schedule out projects I can make versus buy. And let's not forget the added benefit of holding those high priced gifts over the kids heads during summer break (Santa's making a list and checking it twice…..).
But one of the most lovely things I enjoy about the holidays is decorating. Every year my decorations seem to go up later and later. This year I have decided I will start working on my decorations now. If I create just one decoration a month, I will have plenty of wonderful, handcrafted items to decorate with come the end of November.
I decorated this acrylic stocking with nothing more than a bit of trim, Top Boss Embossing Powder, and Colorbox Pigment Ink. Easy Peasy!
Clearsnap Supplies:
- Top Boss Embossing Powder in White
- Colorbox Full Size Pigment Inkpad in Silver
- Colorbox Fluid Chalk Cat's Eye Inkpad in Chestnut Roan
Other Supplies:
- Pom-Pom Trim – Bazzill
- Other Trim, Brass Rings, Satin Ribbon, Chandelier Crystals – hydrangeahippo.etsy.com
- Gold Cord – Michael's
- Stocking – Clear Scraps
- Pearl Bling – Prima
- Paper – KaiserCraft
- Heat Gun, Punch, Stamp – Other
Liberally apply the Colorbox Full Size Pigment Inkpad in Silver to the stamp to cover the image on the stamp completely.
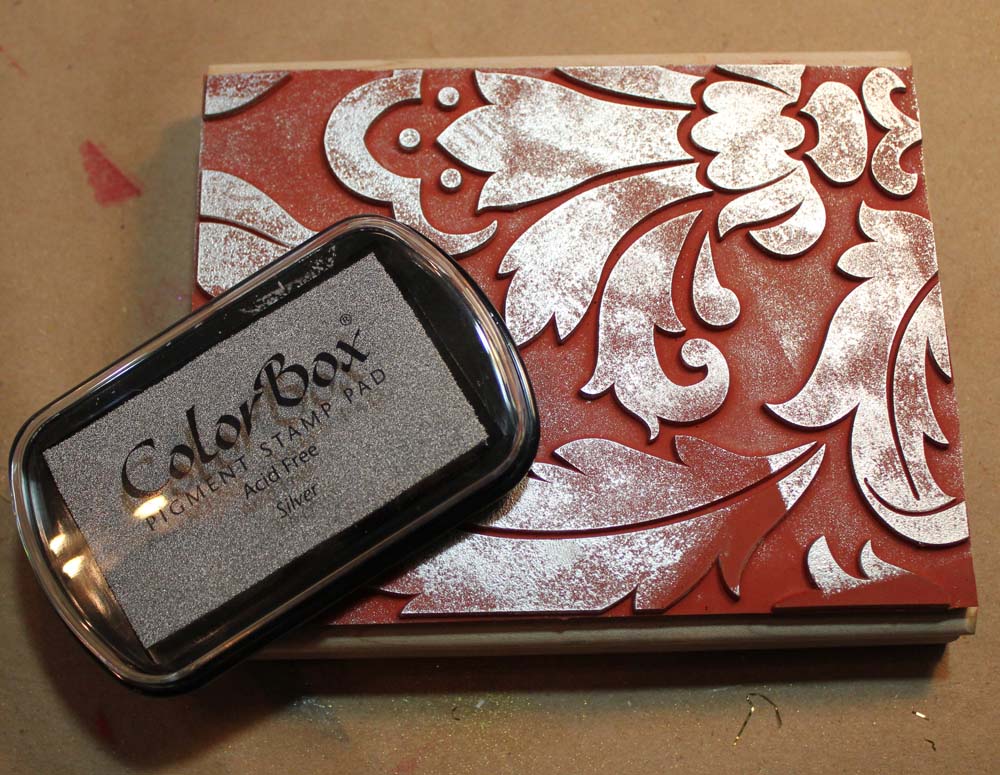
The Colorbox Full Size Pigment Inkpad in Silver has a creamy consistency and dries slowly, making it perfect for using with embossing powder. Heat setting the ink dries it and also causes the embossing powder to react and set. Nice double whammy!
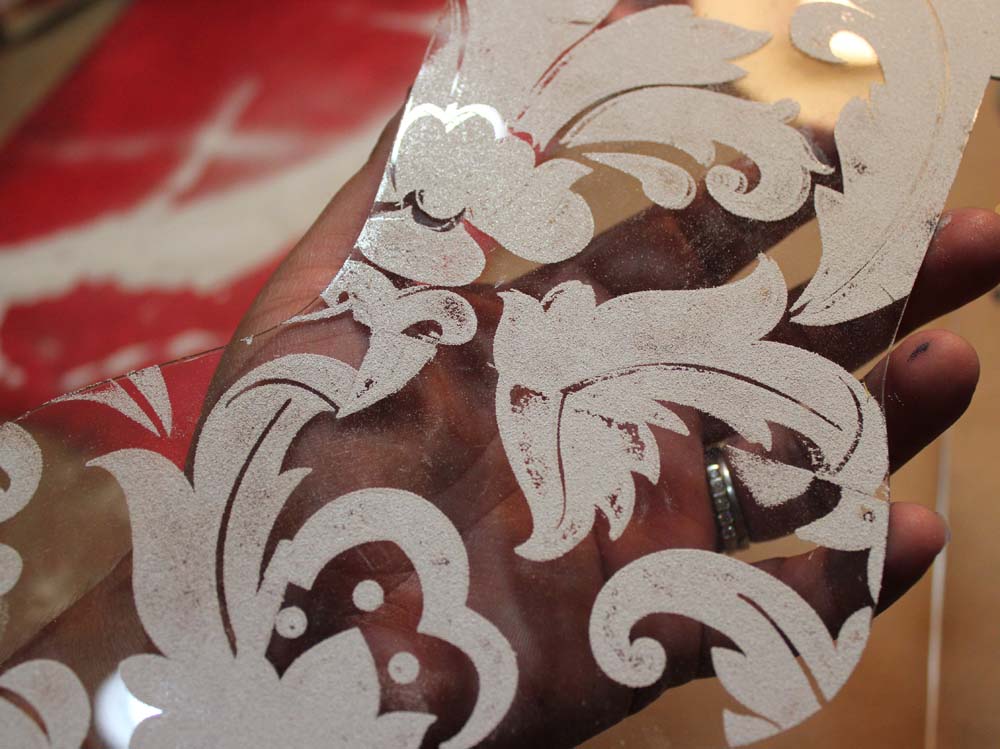
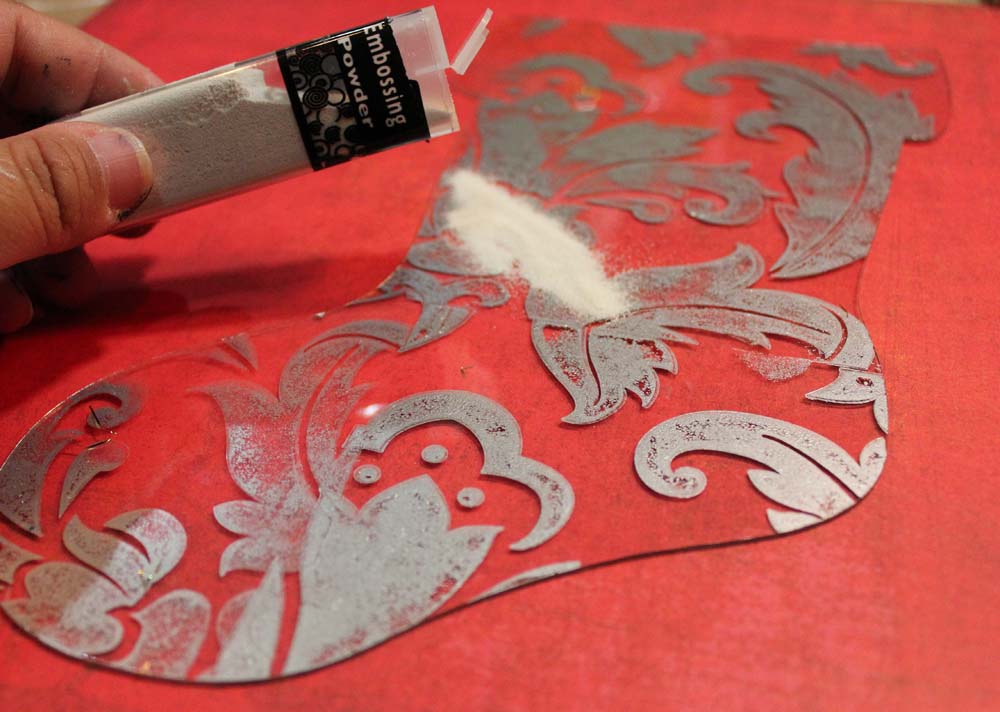
After the stamp has been liberally inked, stamp it onto the back of the acrylic stocking. Continue inking and stamping until the entire surface of the stocking is covered with the pattern. Sprinkle Top Boss Embossing Powder in White over the stamped areas. The powder will stick to the Pigment ink. Gently tap the acrylic stocking to knock the excess powder from the project. Use a Craft Funnel to put the embossing powder back into its container.
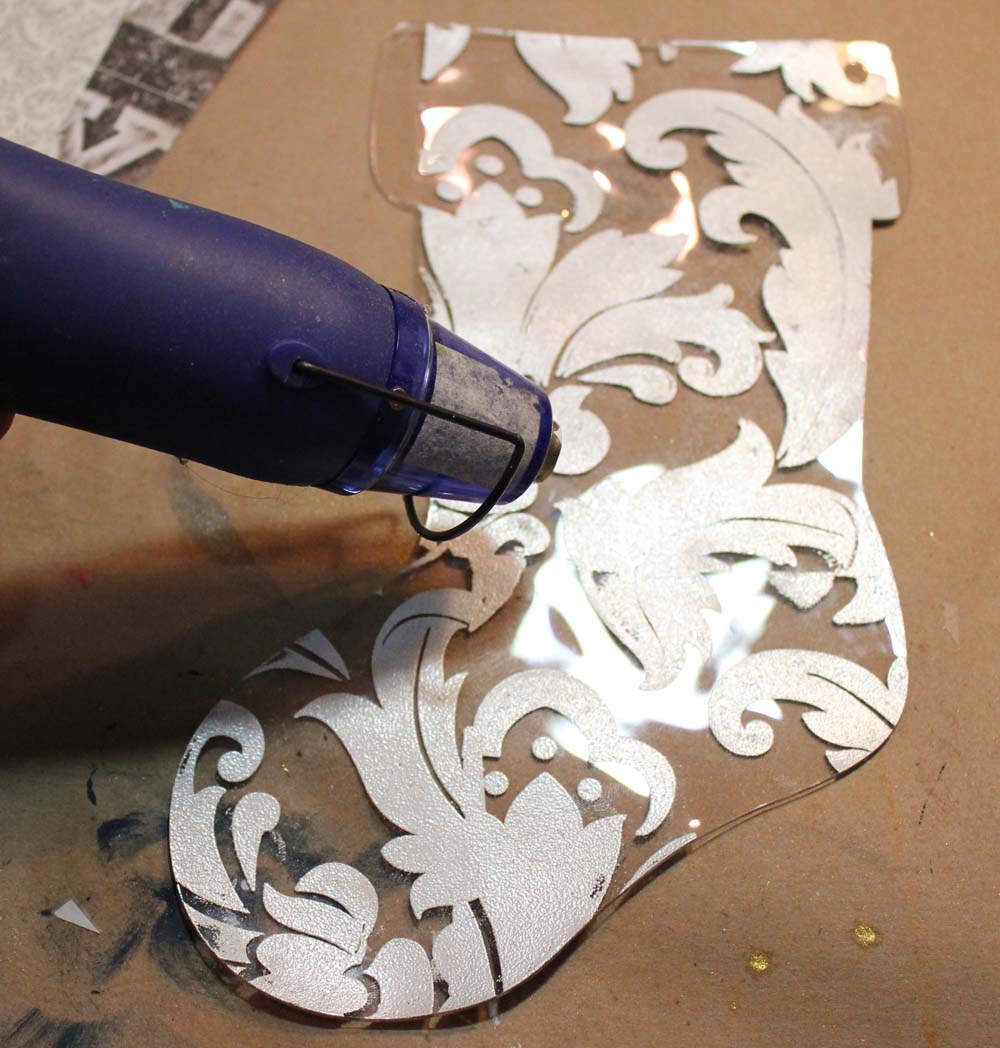
Heat the image to cause the embossing powder to set as well as to dry the Pigment ink. Handle with care as the acrylic does get hot. The acrylic becomes pliable when heated so lay on a flat surface to cool. Using the Colorbox Full Size Pigment Inkpad in Silver with the Top Boss Embossing Powder in White results in a mercury glass, mottled finish that is perfect for this vintage style stocking decoration.
Ink the edges of the acrylic on the front with Colorbox Fluid Chalk Cat's Eye Inkpad in Chestnut Roan. Add chandelier crystals with brass rings. Tie a gold satin ribbon in a bow through one of the rings to act as a hanger. Ink the edges of the punched paper snowflakes and ornaments with Colorbox Fluid Chalk Cat's Eye Inkpad in Chestnut Roan. Tie gold cord in the ornaments and add to the front of the stocking. Add the snowflakes to the stocking with pearl bling in the centers and hang in your favorite spot.
Lovely and easy, right? I plan to hang several of these on a pine garland across the top of a large curio cabinet in my dining room. This projects took only minutes to create and was tres affordable to boot. Hope you are inspired to get started on your holiday gifts, cards, and decor this July.
very very pretty… great idea too!
What a lovely stocking!