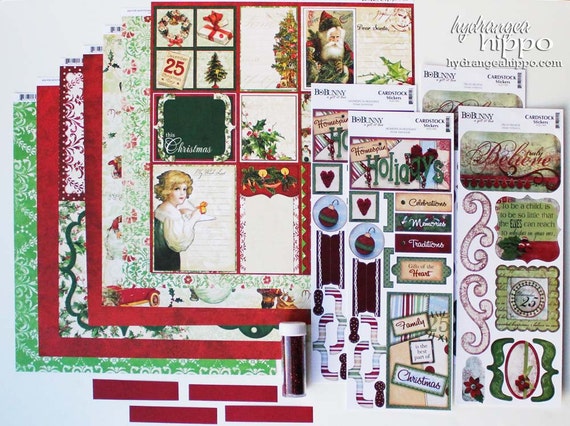
This month I got to work with the Mistletoe Vintage Paper Crafting Kit. First, I have to admit to you that Christmas is pretty much my least favorite theme to paper craft, so when I received this kit I was nervous. It proved to be so easy to work with though! It has a traditional-vintage feel to it. Most of the colors are a little muted, which made them easy to pair together. The variety of embellishments in this kit also made it easy to dress things up!
This kit is really packed with goodness and possibilities! I made these four projects and I still have enough leftovers to do at least 4 more!
I am happy to say that I have a significant jump on next year's Christmas crafting! So, without further ado, here are the projects that I created.
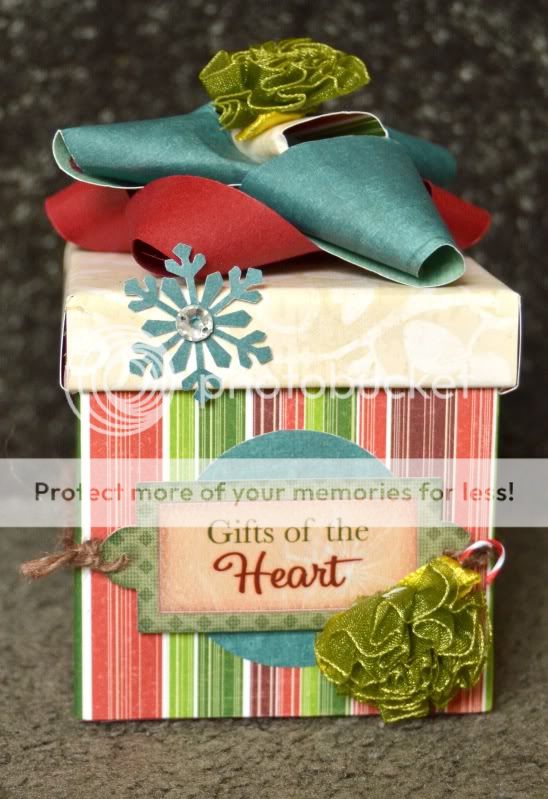
I started with this adorable little altered box. The strips of red and blue came in the kit and when I saw them, I just knew I had to make a fancy bow with them. The box itself was something I picked up on the dollar rack at Micheals. You could use any small box or even make it by folding the paper.Other than the box, the only thing I added to the kit for this project was the brown twine.
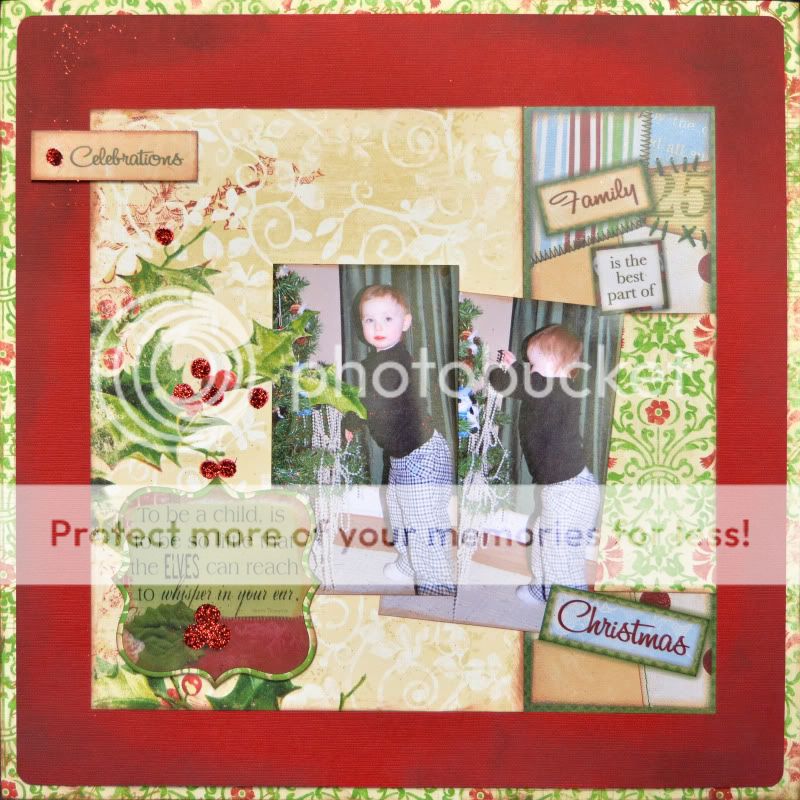
Next, I wanted to make a layout. This, unfortunately, didn't photograph all that well. The photo is just not doing justice to the rich colors and glimmer of the glitter. Here, I added the red cardstock and some ink, which I sponged onto the corners of the cardstock to distress it. I also used the ink around the photos and the stickers. I applied the glitter which came in the kit, with Glossy accents to the holly berries and the dot on the celebrations sticker.
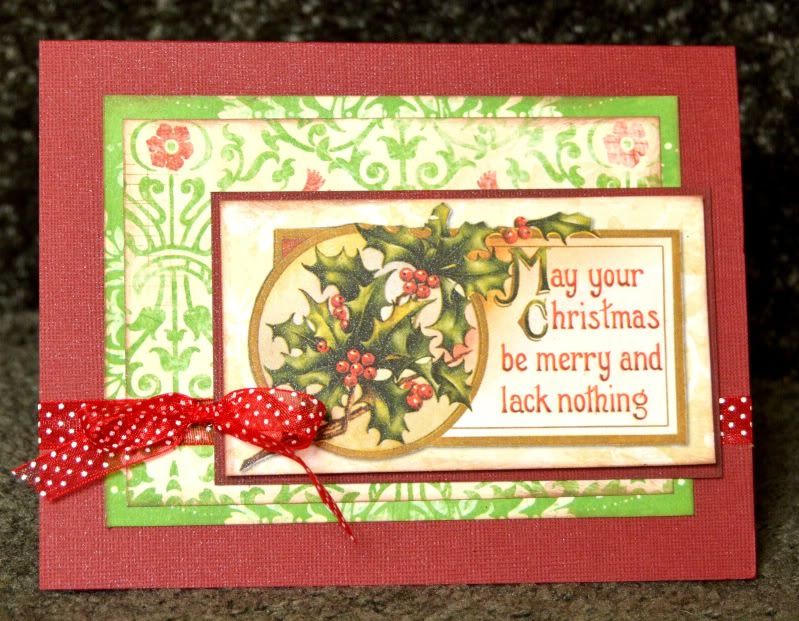
Next I made a card. When I go back to this kit I plan to make a bunch more cards and get a real jump on my Christmas cards. It's so nice to have them done ahead of time. This one was so simple. I just cut the sentiment from one of the papers and matted it on cardstock. Cardstock and ink were the only things that I added here.
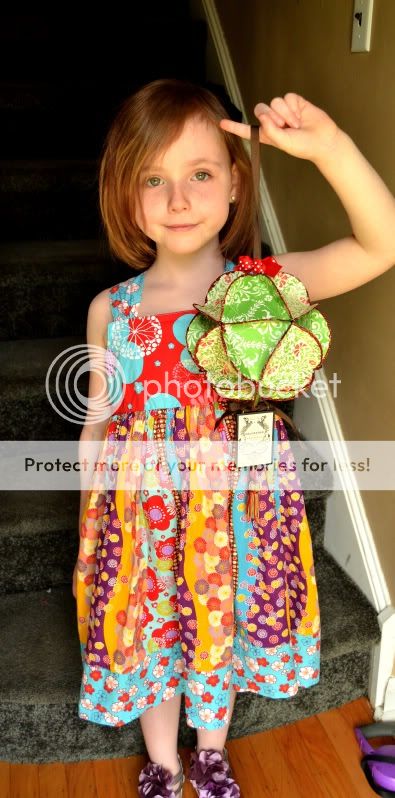
Finally, Ive been wanting to make one of these ornaments for a while. I want to hang it from my dining room chandelier. (That's why I gave up on making more cards right now and moved on. I just had my heart set on making this geodesic paper ornament.)
Here it is, held by my beautiful little helper, to show you some scale. This ornament is created from 20 3.5 inch circles of paper. After you cut the circles, you fold three equal sides in to create a triangle. Then you just glue the folded sides together. I glued 10 in a straight strip (alternating one up, one down), 5 in a circle for the top and 5 in a circle for the bottom, then I glued the strip to the top and the bottom.
Before adhering the top and bottom, you put a ribbon through the hole in the bottom and tie a knot on the outside to create the hanger. And then you run the rest of the ribbon through the ball and out the top.
After the ornament was assembled, I applied glossy accents to all the seams and dipped it in glitter. Then I untied the knot at the bottom and used the ribbon to tie on the bird panel charm that came in the kit. Finally I added an additional bow at the top, tied around the hanger. The only non-kit supplies here are the adhesives and the brown ribbon that I used as a hanger.
Author: Jennifer Priest
It started with jewelry, beading, sewing, home decor, painting, basket weaving, pottery, and cross-stitch. Marry that to an entrepreneurial spirit & at 9 years old a girl is selling her wares at craft fairs as far as her parents and grandparents would drive her. These days, Jennifer enjoys crafts of all genres from sewing to scrapbooking to jewelry with a little dabbling in the mixed media world. Her style is approachable and she wants everyone who sees her work to feel that they too can embrace creativity and make their home and life beautiful.


Love your projects