Just moving this over here onto my blog…
Woven Ribbon Binding
Sometimes your project just needs something a little different than wires or rings – ribbon binding can create a romantic or soft look for a mini book when wires won't do.
Supplies:
A mini book, ready to bind
Bind-It-All
Ribbon to bind with
Fat Pen or Marker (about 1/2″ or more in diameter)
Paper I used in this book is Tinkering Ink
Instructions:
1. Punch the binding holes for your book as if you were binding it with wires. You can do with this the Crop A Dile if you don't have a Bind It All.

2. Cut the ribbon so that it is 5 times longer than the section you are going to bind.
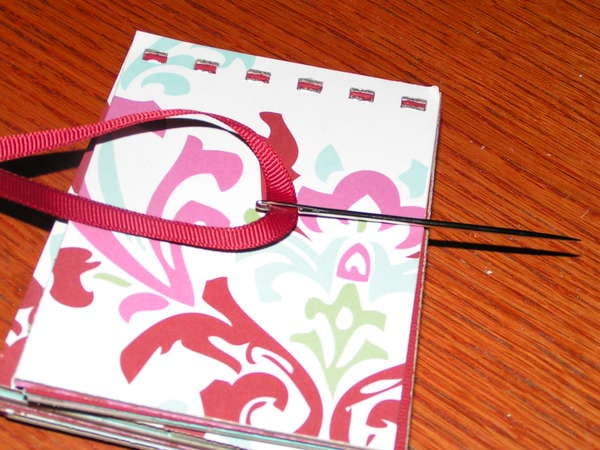
3. Starting in one of the center holes, thread the ribbon through one hole in all of the pages. One side of the ribbon should be about 6-8″ long. The other end will be longer.

If your ribbon is a small diameter, you might consider threading it through a yarn darning needle to make the binding process easier.

4. Lay the fat pen or marker where the binding will go – this will act as a spacer for the binding. If you did not have a spacer, the pages in the book would not be able to lay flat when opened.

5. Take the longer end of the ribbon and continue to thread it through the binding holes, working your way to the right. Once you get to the end of the book, thread the ribbon back towards the left. You should get a lacing effect.

6. Continue this until you reach the left end of the book. Double back again. Stop when you reach the center of the book again.

7. Tie the two ends of the ribbon together in a knot, as tight as you can. This will help the binding to stay in place once you remove the pen.

8. Tie the ribbon in a bow if you like.
9. Slide the pen out from the binding. Now the book is bound!


10. When you open the book it should lay completely flat.


Hope you have fun trying different materials for binding your books. You can use this same technique with tulle as I did for this book. I simply threaded the tulle through the holes and tied each length of it — I did not lace it as I did in the sample above.


Enjoy!
Thank you so much. I have always wondered how they do that at the scrapbook stores.
Great tutorial! That book is stunning!
Gorgeous bk !! =)
rad mini album!! i love it ~ but i bet you knew i would!!!!