Here's the start of something new! Every Friday, starting with today, I'll be posting a simple project with just 5 elements. It could be an altered item, a layout, a card…something papercrafty and with 5 components, 5 steps, or that can be done in 5 minutes. It's all about fives on Fridays.

“Countdown Method”.I can waste a good 30 minutes looking for the “perfect embellishment” right in the middle of designing a layout–in that same amount of time I could have completed the page and moved on to another. By limiting the number of items in front of myself, it is easier to focus on the design and finish the layout quickly.
The “Countdown Method” consists of choosing a number first — usually I choose 5.
Then you justcount down:
- 5 embellishments (brads & buttons)
- 4 photos
- 3 patterned papers
- 2 stickers (alphas and a circle)
- 1 Precut Border
Any tools, cardstock, ink, titles, and adhesives are freebies and you don't need to “count” them unless you want to. The more restrictive you are, the faster the page design will go, or at least that is how it works in my case. I do like to use alot of stuff so I am pretty liberal with the freebies (tools, etc).
Now, I could easily lose myself in choosing all of these elements and pore over my embellies for hours, totally defeating the purpose of the method–to complete pages fast. Trying to choose the elements in order (1, 2, 3, 4, 5 etc) could take forever too because where do you start?! Do you choose one paper or 5, choose 4 brads or 2 brads…?!?! Ahh!
The way to really get things moving is to have a starting point. Photos are the best place to start, naturally, since scrapbooking is supposed to be all about the photos.
Now I do make mistakes, I change my mind, and things aren't always a masterpiece. I'm not perfect and no one else is either. If someone tries to say they just sit and create and it comes so naturally perfect every time, they are lying and don't you buy their snake oil! LOL What follows here is a gilmpse into how I really think and how I really create pages.
STEP 1: For this page I had 4 photos. They were snow photos so the next step would be to find some snow paper. Since Xaver was wearing brown in the pics I knew I didn't want that color so I went for the blues in the snow.
STEP 2: I had two sheets of Imaginesce snow paper. They were both busy patterns so I needed one more sheet to round out it and be my background–when in doubt, I always turn to Scenic Route notebook patterned papers because they match everything. So there are 3 patterned papers…now to find embellies…
STEP 3: I had one sticker left that matched the papers – it was a two-parter with a snowman in the center and a ring around the outside…so there are the 2 Stickers.
STEP 4: Definitely I wanted some snow embellies so I opened my”white” drawer (I have everything arranged by color in my scrap area) to find something “snowy”. I had 4 white snowflake brads and 2 clear snowflake buttons. Embellies usually look best when use in odd numbered amounts so I took out 3 of the brads and the 2 buttons…now I had my 5 embellies.
STEP 5: I needed something to breakup the busy patterns on the page so I chose a cardstock border from a set of Bazzill Just the Edge borders. The zigzag one looked kind of like icicles and I was doing a page about the hubby and didn't want a girly looking scalloped border since there was already glitter on the paper so then there's the 1 border.
Now as far as putting it all together, that is the design part and could take some hours if you get stuck. I used a tool – a sketch- as a jumping off point to prevent me from staring at the paper for another half hour. My page does not look like the sketch at all (on pg 63 of the Scrapbook Etc Page Planner issue) but it got me going. Again, tools are freebies.
I cut that crazy snowman paper down to 8″ tall. I attached it to the middle of the notebook paper page. I then cut two 1″ strips of the striped paper (it is argyle on the other side which I wanted to use initially but it was too green and dark) and attached those across the top and bottom of snowman paper.
Then I added the Cardstock border across the bottom.
The snowman really bugged me because he was so big and dominating the page. I knew I needed to get a title so I used him as a base for the title. On the sketch the title was on that side of the page so that's where I decided to put it too.
Oh, and here's a little trick in case the elements you have on hand are off a shade from everything else. Ink it like crazy–if everything is inked in the same color it ties all the elements together. Now of course this won't work with some things–inking everything orange on a purple page will not help make purple and orange match. I am talking about when you have two shades of blue and one just isn't quite right. The alpha stickers, cardstock border, and cardstock I used for matting did not match well at all–so I just inked them alot and they “work” now. And then I inked everything else to tie it all together (sticker, all the other papers, etc). Like Tim Gunn says, “Make it work” (I LOVE Project Runway!!)
I cut all my pics down and matted them. The sketch had all these squares for journal spots and such but I used that as a guide for cutting my pics. Once I started cutting I realized one of the pics wouldn't look right cropped so small so I left it longer than the others. Make it work…
I laid the pics out. I decided to highlight the smallest pic with the ring sticker . But then the sticker looked lost. So I punched out an arrow from cardstock with the SU! arrow punch (more freebies) and used that to highlight the photo even more. I ended up using the snowman sticker from the center of the ring on a card I made from the scraps leftover from the page.
I added my buttons and brads across the bottom. I normally don't use a ruler but I wanted them to be evenly spaced so I just laid a ruler across the border and put an item every 2″, alternating between buttons and brads.
Really, you don't have to be a stickler for the “rules”. If you decide later that your page really needs more stuff, go get it. The point is to get you going and committed to laying everything down, just using what you've got in front of you. I ended up deciding that this layout needed journaling strips instead of handwritten journaling on the notebook paper (which was my first plan). I made journaling strips on the computer, inked them to match, and finished off the page, even though they weren't in my initial plan. I did spend about 5 mins trying to figure out which font to use and then realized I was spending wayyyyy too much time on it so I committed to one of my faves, Teen Light.
Now, it is taking me probably 10 times longer to explain my entire creative process and everything that was going through my head than it did to make the layout. All of these decisions were made in seconds and actions done in seconds… maybe minutes in the case of the journaling. It really is a fast way to get things done!
Here's another layout I did using the same concept:
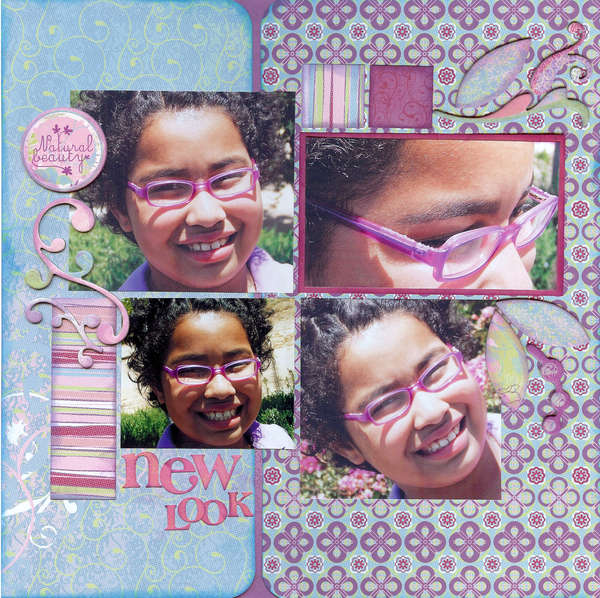
- 5 patterned papers
- 4 photos
- 3 sets of chipboard accents
- 2 journaling items (chipboard circle and a title)
- 1 photo mat
This layout was actually a scraplift for a challenge but I used the “Countdown Method” to choose all of the page elements. I had decided to participate in the challenge about an hour before it ended so I made the page in half an hour, scanned it, and got it uploaded all in a total of 45 minutes from start to finish. I would not say it is my bestest most inspired work ever but I got another page done, used some stuff from my stash, and made it work for a challenge in less than an hour!
Enjoy your weekend!!
This is a neat way to not spend hours on a layout. Great Idea. I will let you know how it works out for me.
I like your countdown philosophy, Jennifer. I also very much liked having a peek into your creative process. Always enjoy seeing how others approach it. TFS!
This is a great idea, to simplify the scrapping process!!! I think you are really on to something big!!
JENNIFER!! i love this! I seriously love it!! You are amazing. do you get tired of hearing that?