Halloween is approaching fast! Webs will make your spooky pages even spookier!!
On this page I created a web by hand stitching with black Craft Thread. You can use embroidery floss too if you like but craft thread is a lot more affordable. Both are sold in the same section of most large craft stores.

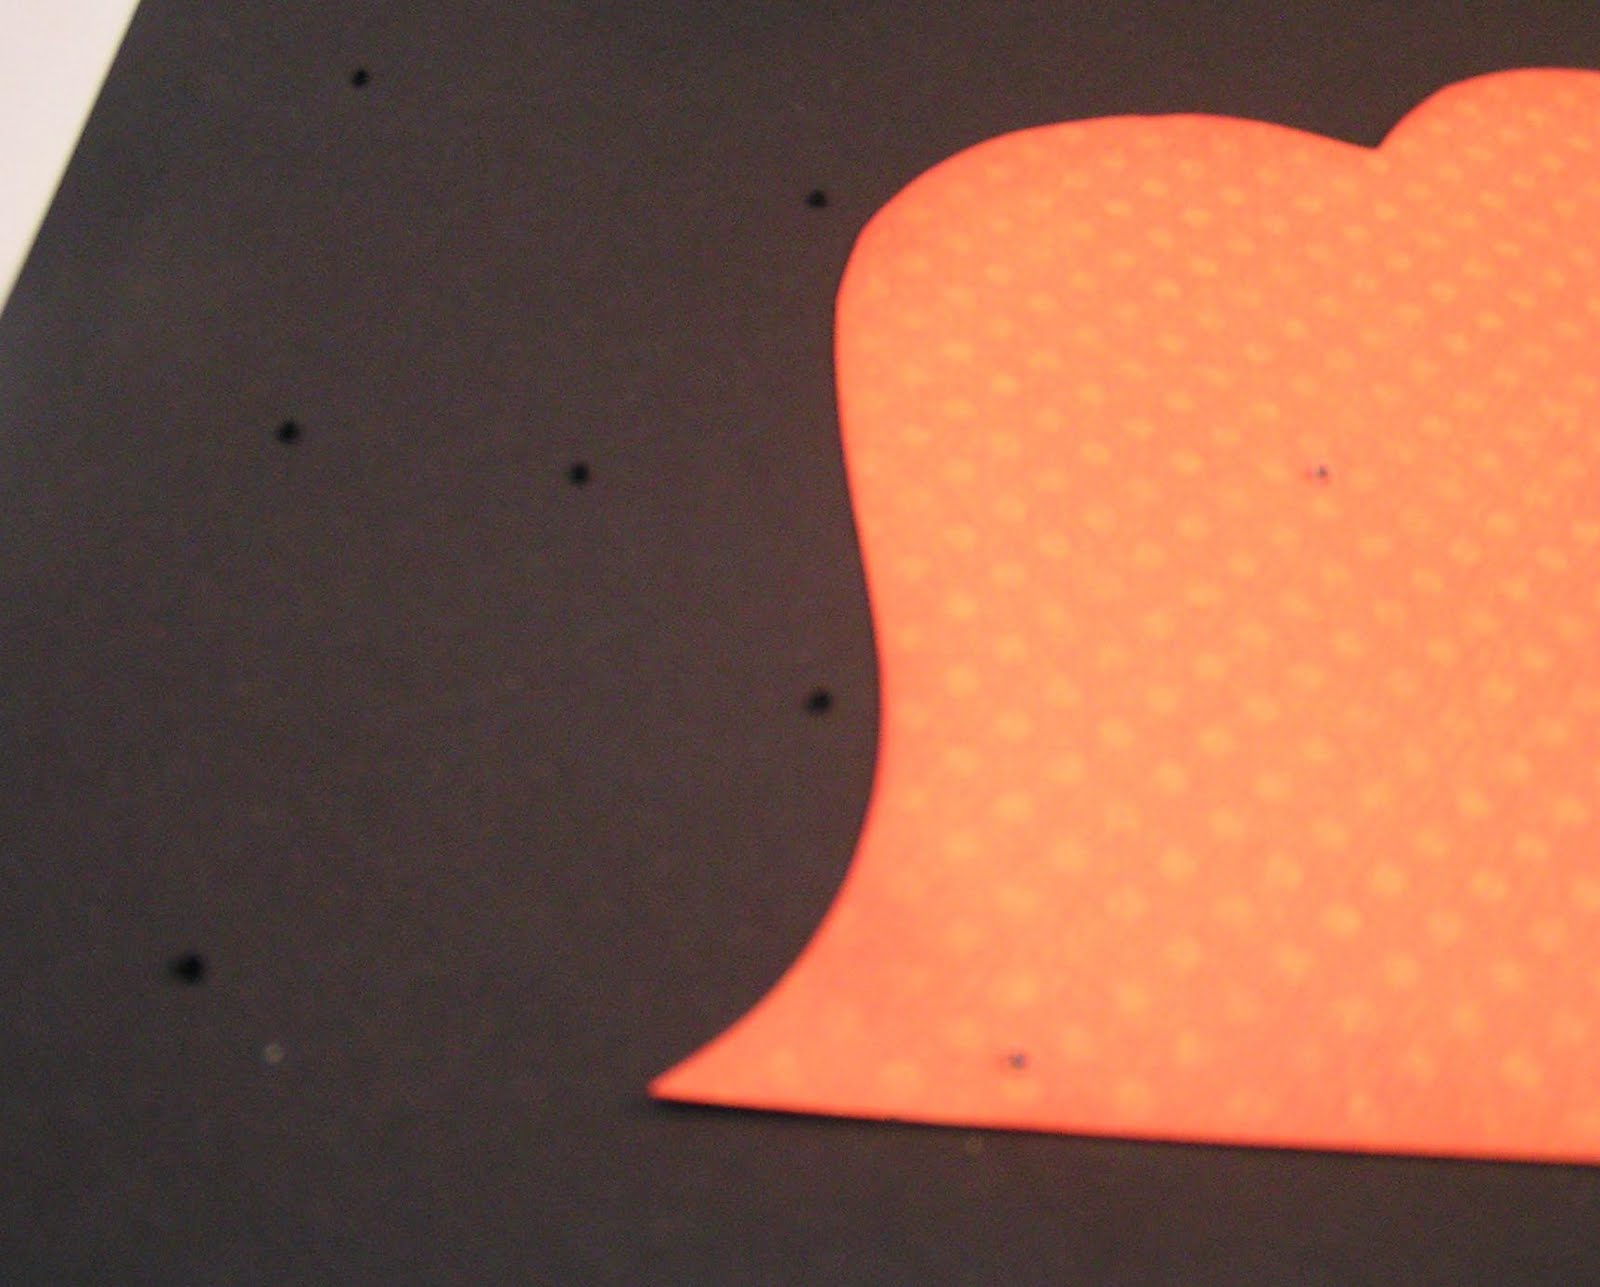
To create the web, let’s first draw a web on the back of our page. I am using white pen to draw the web since the paper is black—if you are using a light colored paper then black pen will be fine. You can use a needle to pierce holes at the intersections of the lines on your web.
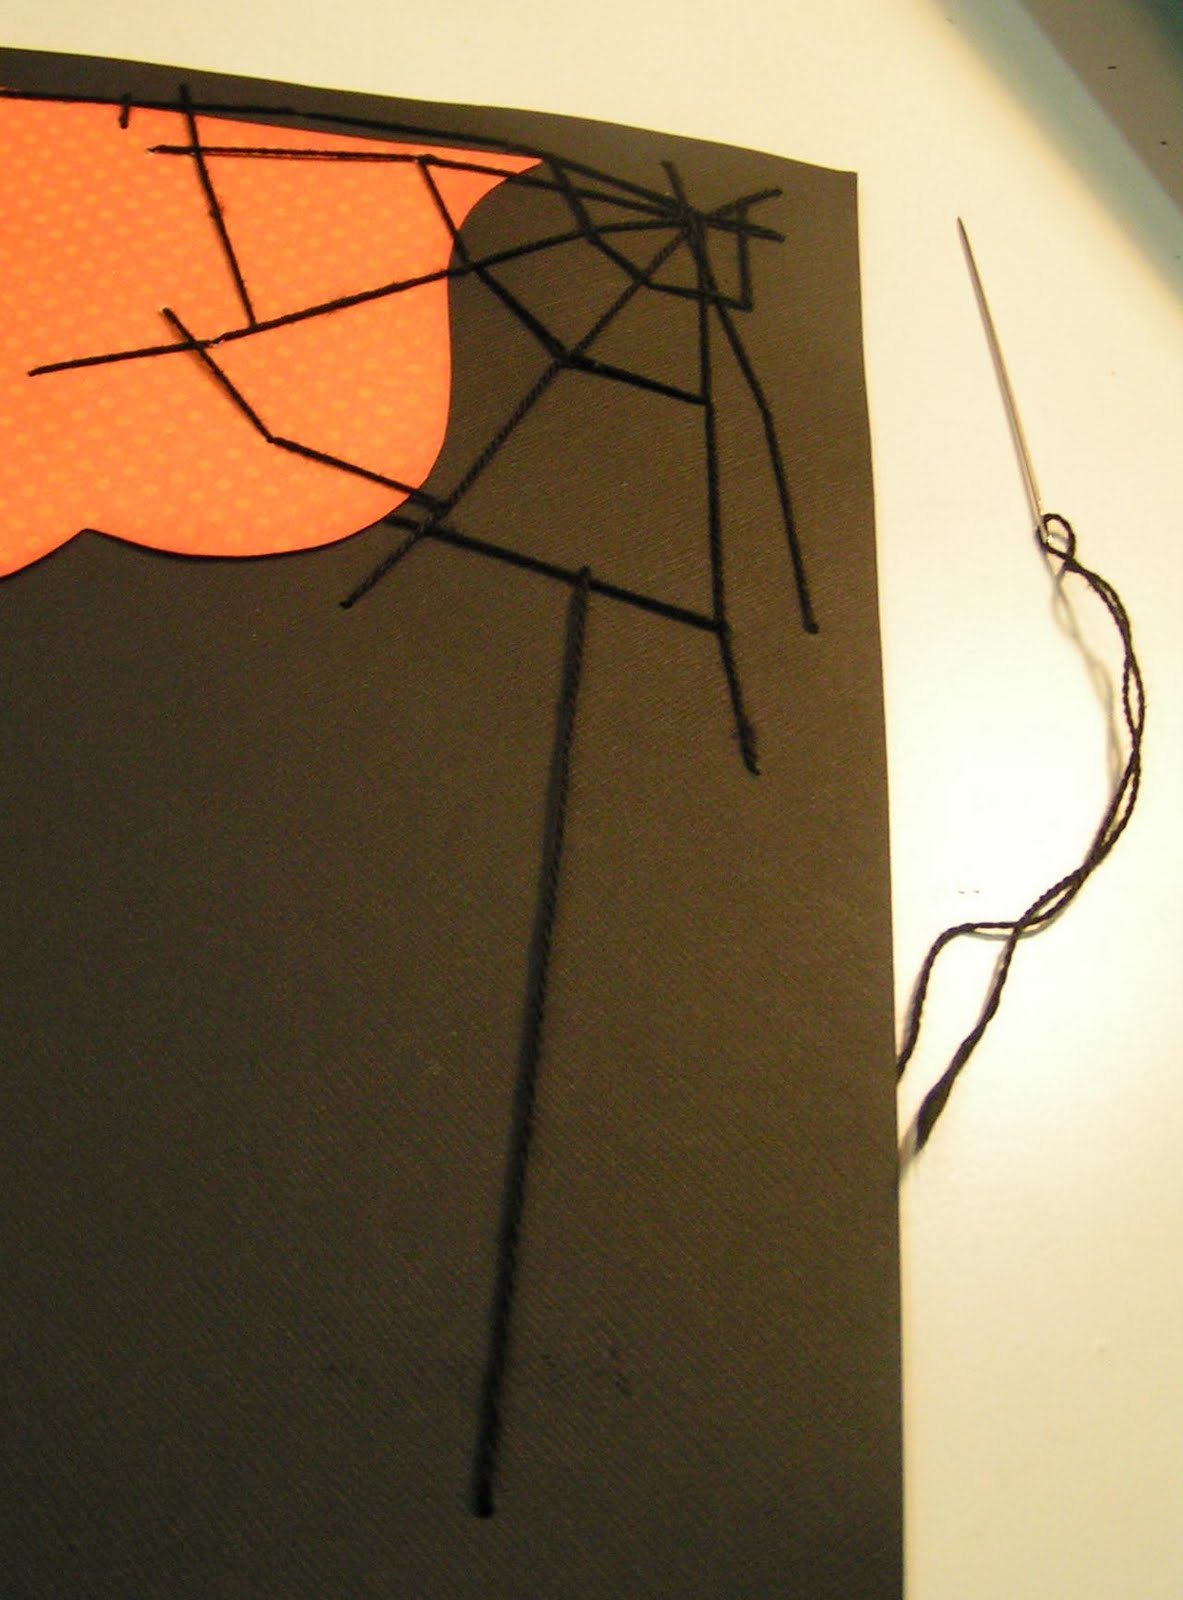
After you draw the web, you can begin stitching. You’ll want to thread the needle with about 1 yard of thread. If you use too much the thread will tangle and knot on itself, holding up your progress. If you use too little you may need to re-thread the needle in the middle of the project.
Make sure you knot the end of the string so it is not pulled through your stitching holes.

Start at the corner of the web and work your way out. You’ll start and end stitches where the web lines intersect. It might be helpful to pierce holes where all these lines intersect so you can easily find the right hole to thread the needle through from the front of the page when finishing a stitch. Your web should look similar to the one pictured here once you’ve made a few stitches. After you’ve created the base of the web, you can add more stitches where you think you need them. Either draw them on the back and then stitch them or you can free hand stitch these extra web lengths.

You can also stitch a piece of web for a spider to hang from.
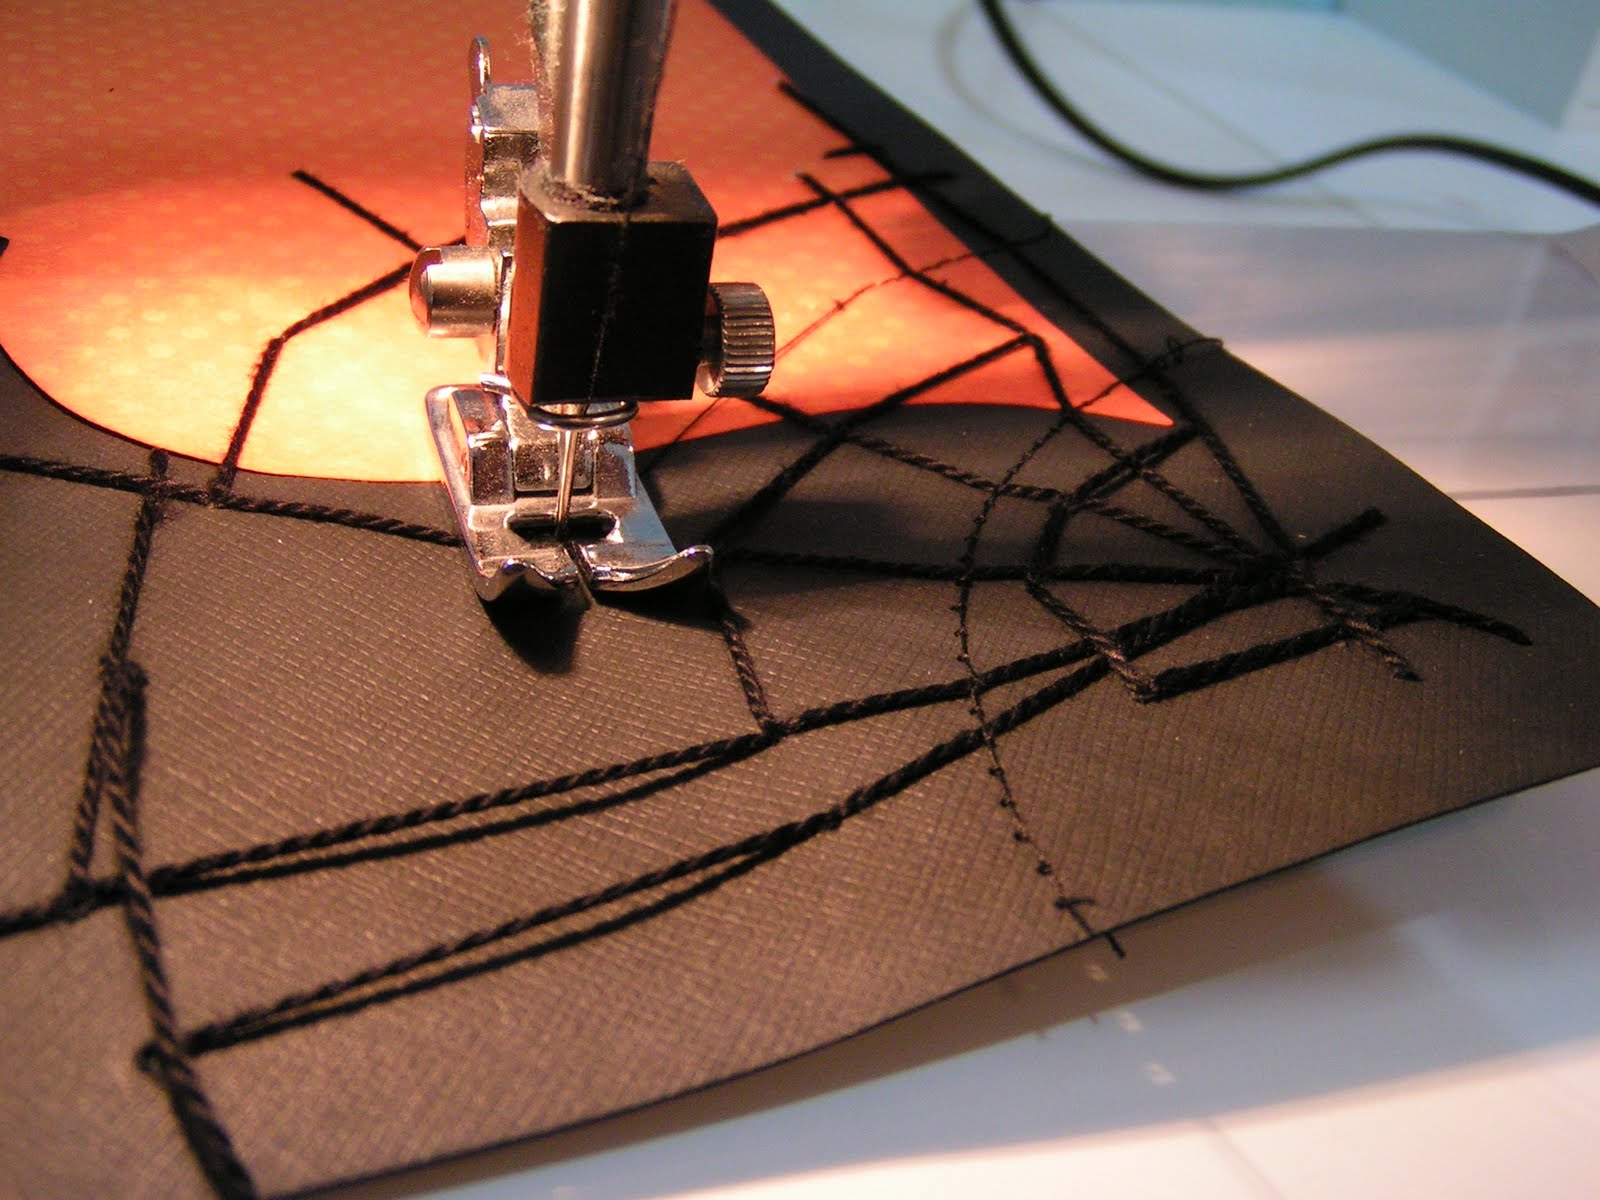
You can either stop stitching the web here OR you can add even more detail with machine stitching. Make sure you thread the machine with black thread. You’ll need to have a basic knowledge of sewing machines to do this ;)
When sewing on paper you want the stitch length to be as long as possible. The machine has a hard time moving the paper as it stitches so you’ll need to help move the paper otherwise you’ll end up with really tiny stitches and possibly ripped paper. I set my stitch length to 6 – this will vary from machine to machine but most have diagrams so you can see the actual length of the stitch:

Set the tension knob pretty low, like on 2 or 3. Try stitching on a scrap of paper to see what happens. If the paper rips, the tension needs to be loosened. If the thread loops and you have bunched up thread in the stitching, tighten the tension. Always practice on a scrap before sewing directly on your final project!!
Make sure that your bobbin is threaded with black thread as well.
Start by sewing one of the pieces of web. You’ll need to move the layout along the curve of the web. Make sure the largest part of your layout is facing to the left of the needle so that is does not bunch underneath the machine (to the right of the needle).


Keep adding stitches until the web is as spooky as you like.