I love the look of starburst mirrors but have not bought one because of the price tag–the ones I like are always over $100! Plus, the finish is never exactly what I want– too bright of a silver, too gaudy of a gold…I have been looking for one of these mirrors to put in my house since they started getting popular a couple of years ago.
Over the summer I bought three round mirrors on clearance at Target for $3.24 each. They have been collecting dust while I was figuring out what to do with them–the deal was too good to pass up even though I did not have a plan.
Over the holidays, Xaver and I went to several thrift stores looking for good things to alter, stuff for our house, etc. It is silly that I was dropping off loads of stuff to get rid of in the back of the store and then going inside to buy more stuff but hey, it was an efficient visit to each thrift store!
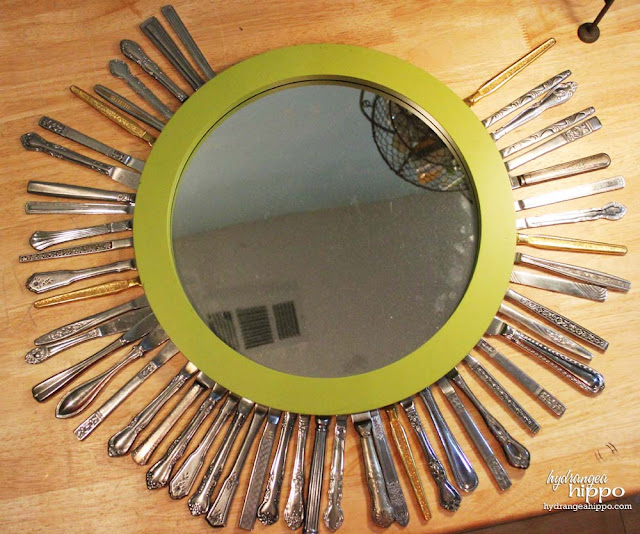
In Salvation Army, Xaver spotted several tubs of silverware, each sorted by type, on sale for 5 for $1. Once we saw the knives, we knew they would be perfect for the mirror! I've seen mirrors like this created with plastic spoons but honestly they look like plastic spoons on the finished mirror and I wanted something a little more unique.
I hung the mirror over our mantle with a couple candlesticks around it — it was a perfect fit there! This was easier to do than I thought it would be and cost under $30! Between assembly and painting, the mirror took 2 days to create.
Here's how to make it:
Remove all the hardware from the back of the mirror to create a flat surface for the knives to adhere to.
Lay out the knives in a pattern around the mirror. Make sure to vary the patterns and the long and short handles.
Use epoxy or hot glue to adhere the flat part of the knife to the back of the mirror. I tried E6000 and it did not work so well.

Next, tape off the center of the mirror to prep for painting. I wove wire around four of the knives to make a “X” across the back of the frame to create hanger. Once the mirror is painted, the wire will not be noticeable from the front anymore.
I used Rust-Oleum Universal Metallic Paint & Primer in Aged Copper to paint the mirror–two coats is all it took! The paint has a glittery shimmer in it that I thought was really cool. It adhered really easily to the plastic and metal too–my new fave spray paint!
Supplies:
- Rust-Oleum Universal Metallic Paint & Primer in Aged Copper = $7.69
- Mirrors @ 2 x $3.24 = $6.48
- 50 knives from Salvation Army = $10
- Wire = $1.99
- Cardboard, tape, screwdriver, hot glue not figured into cost


What a great project! It looks very upscale, and to think that you invested just over $25. Good Job.
What a great project! It looks very upscale, and to think that you invested just over $25. Good Job.
Hey that is sooooo cool!!! I have a perfect spot for a mirror like that. Fab as usual Jen.
Hey that is sooooo cool!!! I have a perfect spot for a mirror like that. Fab as usual Jen.
Cool and recycling!
Cool and recycling!
wow you are so amazing at the stuff you think up!!! Love it – Nancy H
wow you are so amazing at the stuff you think up!!! Love it – Nancy H
This is the best sunburst mirror EVER!!! I hope you tried out for the show on hgtv is it? The one that Christie T is doing. I can’t believe I didn’t think to mention it to you but hopefully someone did!! I know you could make it onto the show! You would kick butt!! xoxo
This is the best sunburst mirror EVER!!! I hope you tried out for the show on hgtv is it? The one that Christie T is doing. I can’t believe I didn’t think to mention it to you but hopefully someone did!! I know you could make it onto the show! You would kick butt!! xoxo