![]()
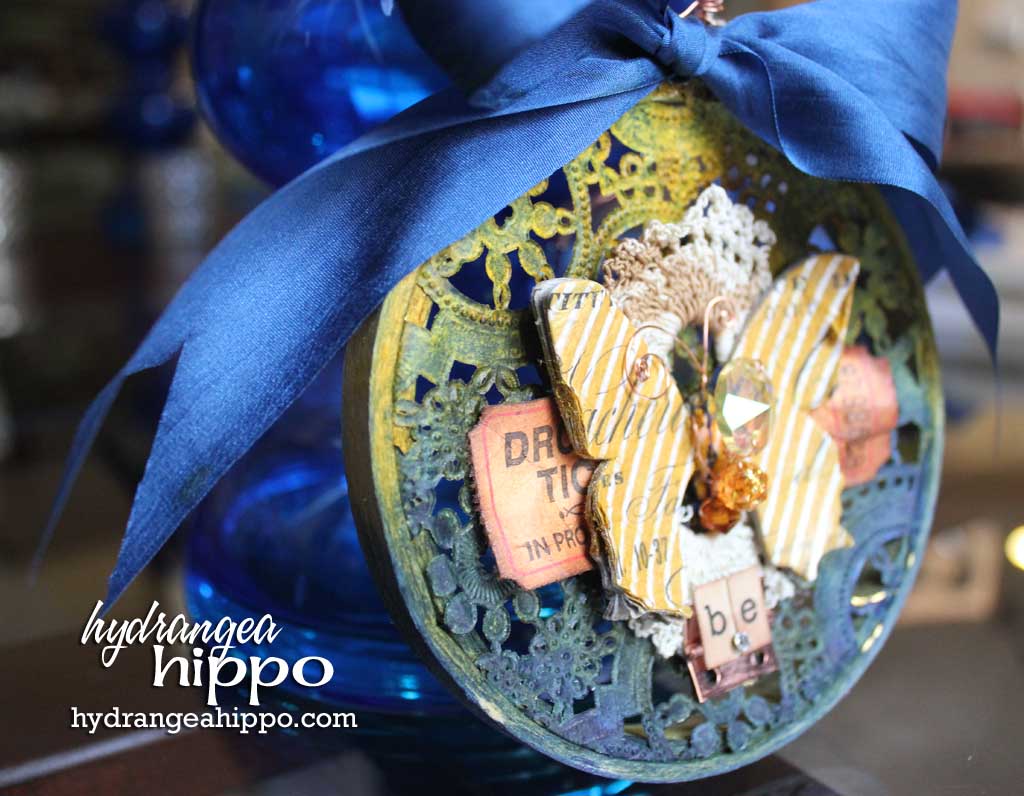
One of my current fave color combos is orange + gold + royal blue, and though it might not be totally on trend with this year's emerald green Pantone color, I find that this rich color combo is easy to work with and always produces great results! When I inherited my grandmother's sewing notions, I was found a bundle of vintage wooden embroidery hoops. I don't know why she thought she needed 18 embroidery hoops, all the same size… crazy lady! LOL This altered embroidery hoop project is farily simple to create in just about an hour using an ornate paper doily, embroidery hoop, and assorted ephemera. I created this memory piece as an inspiring reminder to myself to just “be” happy with what is.
![]()
![]()
To create this project gather the following supplies:
(some of these are affiliate links which help support our free blog tutorials)
- Smooch Spritz in Candle Glow, Navy Twinkle, and Gold Glow
- Basic Necessites Jumbo Spritz Bottle, filled with water
- ColorBox Fluid Chalk Cat's Eye in Chestnut Roan
- Color Catcher
- May Arts Silk Ribbon*
- Wood Embroidery Hoop*
- Intricate Paper Doily*
- Ticket*
- Crystal beads and crystals*
- Copper Wire, in 2 sizes
- Pink Paislee Artisan Chipboard butterfly
- Copper hinge
- Alphabet stickers
- Hot glue
- Old crocheted doily that can be cut up*
*Supplies for this project can be found in the “BE Amazing Embroidery Hoop Kit” in the Hydrangea Hippo Shop.
- Insert the intricate paper doily into the embroidery hoop as if it were fabric and tighten. Trim the edges of the doily.
- Lay the hoop in the Color Catcher. Spray a horizontal line of Smooch Spritz in Gold Glow across the top of the hoop. Next, spray a horizontal line of Smooch Spritz in Candle Glow across the middle of the hoop. Finally, spray the bottom of the hoop with Smooch Spritz in Navy Twinkle. Spray with water and allow the lighter colors to drip downward towards the Navy Twinkle part of the hoop. Dry with a heat gun.
- Tie a piece of blue silk ribbon into a bow and hot glue to the top of the hoop.
- Spray a chipbaord butterfly with Smooch Spritz in Candle Glow and distress the edges.
- Wrap the center of the butterfly (body) with copper wire and beads.
- Cut two pieces of crocheted doily and adhere to the top and bottom of the center area of thehoop.
- Adhere the butterfly between these two doilypieces.
- Tear a ticket in half, ink with ColorBox Fluid Chalk ink in Chestnut Roan, and tuck under each wing of the butterfly. Hot glue into place.
- Add the hinge and sentiment to the bottom of the hoop.
- Twist wire around the screw end of the hoop to make a hanging loop.
You can hang this on your wall all year around or create several of them to use as Christmas tree decorations.

I absolutely adore the colors in this project Jennifer. The blue just pops!
This is WONDERFUL, and extremely timely. I was thinking of making an altered embroidery hoop (I received a bunch from a friend), and didn’t know where to start. :) Gorgeous work!