Today I'm sharing a little project I made with Donna Salazar's Spring In Bloom 12×12 Collection Pad, her exclusive Spellbinders Paper Arts Rose Creations Die Set , and Donna's favorites from Clearsnap.
May flowers are abundant this year due to all the rains. I can't believe the end of Spring is already coming…I wish we had a little more time to enjoy it! With Mother's Day around the corner I thought a hand crafted boutonniere was in order – Donna's In Bloom lacquered roses paper with its soft english roses was just the ticket for this project. Make mom or grandma feel special by showing up with a handcrafted flower on her special day or just make one to keep that spring feeling in the air.
Doesn't Matt look cute with this flowery boutonniere? Here's a closeup of the layers:
Here's how I created the boutonniere:
Cut out the english style roses from the In Bloom paper.
Following the lines of the petals, gently cut lines through the largest rose. This will form the base of the boutonniere for the rest of the flowers to rest on. Cup the cut up flower in your hand to form a more realistic flower shape. Adhere the layers together using 3D Foam Adhesive Dots.
Cut a spiral in one of the smallest roses, following the gentle curves of the rose petals.
Coil the spiral up, starting from the outside end and coiling towards the center. Apply adhesive to the center of the spiral (back of flower) and adhere to the layers on the back of the flower.
Cut a spiral from another medium sized flower and continue coiling around the first coiled flower. This will make the flower larger.
Gently fold the edges of the paper down to mimic rose petals. Once the flower has been formed, place it into the base flower (from step one) and adhere.
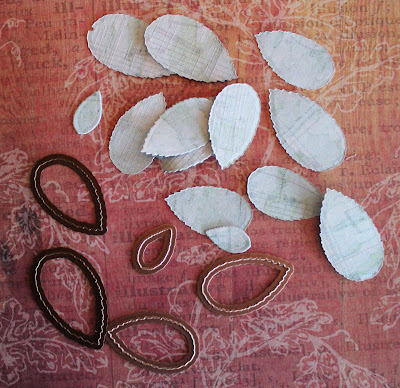
Diecut 8-10 leaves from the White Colored Rose Paper using the leaves from Donna Salazar's Spellbinders Rose Creations Die Set.
Lay the leaves in the Color Catcher by Clearsnap. Spray them liberally with Smooch Spritz in Green Olive. This will cause the leaves to curl and that's just what we want.
Allow the leaves to dry for about 15 minutes or use a heat gun to speed up the process. The sparkle of the Smooch Spritz looks wonderful on the linen finish of the GCD Studios papers – love all of texture and depth that can be achieved by using all of the Donna Salazar Designs family of products together.
After the leaves are dry, curl the ends up or down as desired and begin adhering to the flower. Tuck a few leaves between the bottom layer and center of the rose and adhere the rest to the back of the flower.
After all of the leaves have been added, now we'll add the “ribbons”. The texture of the GCD Studios paper lends itself nicely to creating paper ribbons. On this boutonniere I wanted a prize ribbon feel. First I cut thin, about 1/8″ to 1/4″, strips from the White Colored Rose Paper.
Then I sprayed the strips with Smooch Spritz in Pralines & Cream to make them pliable as well as give them shine and a faint peach color. Pralines & Cream is one of my favorite Smooch Spritz colors because it goes on almost transparent but you can achieve a nice soft peach color by spraying the Smooch Spritz a couple more times if you want.
While the strips are still wet and pliable, wrap them around a narrow item like a pencil or paint brush to create curls.
After the curls are formed, spray them once more Smooch Spritz in Pralines & Cream to give them a little extra color and shine.
After the curls have been sprayed, adhere them to the back of the flower, cascading down.
To complete the prize ribbon look, cut two 1″ wide strips and one 2″ wide strip of paper from one of the sheets in the Spring In Bloom 12×12 Collection Pad. Cut a notch in the end of each strip like a ribbon. Ink the edges of each strip with the Dark Brown inkpad in the Chocolate and Blueberries Cat's Eye Fluid Chalk Queue.
Adhere the two strips to the back of the flower and curl the ends. Here's what the flower looks like at this point:
Add a punched circle to finish off the back of the flower and a pin back to attach it to a shirt. Add to an ornery child to make him cute for a visit to Grandma or Mom :)
Hope this inspires you to create your own spring flowers for Mother's Day. Happy Creating!
Supplies:
Spring In Bloom 12×12 Collection Pad by Donna Salazar Designs for GCD Studios
Color Catcher by Clearsnap
Smooch Spritz in Pralines & Cream and Green Olive by Donna Salazar for Clearsnap
Rose Creations Die Set by Donna Salazar for Spellbinders Paper Arts
Scissors by Westcott
3D Foam Adhesive by American Crafts
Extreme Adhesive Squares by Glue Arts
Pin Back by Darice
Cute Model by Jennifer Priest (hehehe — that's my son Matthew!)
Paint Brush or Narrow Pen
Posted by Jennifer Priest


That is just way too cute! Thank you so much for the tutorial!
This is such an adorable project, Jennifer! I just love Donna’s rose paper, and you took it over the top with your dimensional boutonniere. Love the paper curly-q’s too. And the model! Fabulous!