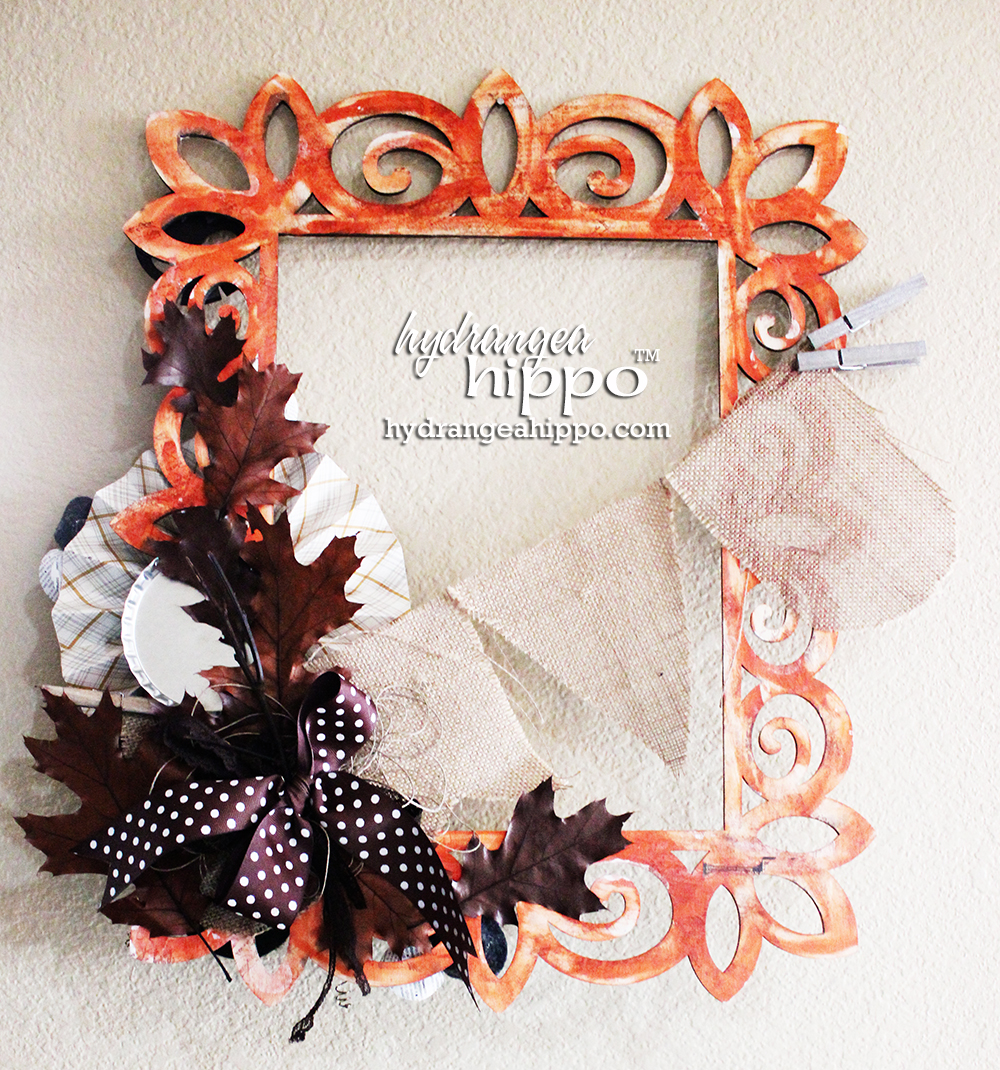
I'm of the Alton Brown school of thought – no “unitaskers” in my life! That means everything has to have more than just one use or purpose. The shape of this wood frame from Michael's Stores really spoke to me but I could not justify buying more than one. With that decision, I set out to create a two sided wreath that I can use for at least 4 months (August & November display the FALL side and September and October diplsay the Halloween side).

This wreath also incorporates leftover beads from other projects — creating your own beaded sprays is a great way to use 5 or 6 beads that aren't enough to create a new jewelry piece.
Supplies:
- Crystal Beads – Orange Black Grey
- Smooch Spritz in Silver Foil by Clearsnap
- Rollagraph Stamp Wheel by Clearsnap
- ColorBox Fluid Chalk Ink in Blackbird and Dark Brown by Clearsnap
- Scissors by Westcott
- Paper by My Mind's Eye and Carta Bella
- Masking Tape by Scotch
- Foam Paint Brush by Tulip
- Large Bottlecap by Maya Road
- Dies and Diecutting Machine by Sizzix
- Felt Flowers
- Paper Flowers
- Wood Clothespins
- Diecut Skulls
- Diecut Stickers
- Acrylic Paint
- Wood Frame
- Pliers
- Silver Doily
- Ribbon
- Trim
- Hot Glue Gun
- Dried Leaves
- Jute Twine
- Wire
- Paper Towels
Instructions:
- Spray the body of the frame and several clothespins with Smooch Spritz in Silver Foil.
- Dry brush the back of the frame with orange acrylic paint.
- Apply strips of masking tape diagonally to the frame. Then paint exposed areas with white acrylic paint. Remove masking tape.
- Wipe any acrylic paint from the orange side of the frame with a damp paper towel.
- Cut pennants from burlap and create a banner — adhere across the middle of the frame, at an angle. Add clothespins to the ends of the banner.
- Cut a piece of 12″ x 12″ paper into three 4″ x 12″ strips.
- Fold at 1″ intervals, accordion style.
- Attach the strips together with Xyron High Tack Tape to make one long strip. Adhere the ends together to create a tube and then flatten to form a rosette.
- Add diecut shapes to the rosette and apply to the frame.
- Thread Crystal Beads in Orange, Black, and Grey onto wire. Wrap one end of the wire around a paint brush to create a coil. Slide a bead next to the coil and then repeat the process on the next seciotn of the wire, sliding 1-2 beads between each coil.
- Cut the wire strip into 3 pieces to make “beaded sprays”. Adhere the sprays between the flowers.
- On the “Fall” side of the wreath, add a large bottle cap. Then add dried leaves and twigs.
- Add the tangled length of jute twine to the focal area. Add a bow from trim and a ribbon bow on top.
- Use the Rollagraph Stamp Wheel to stamp a script design all over the frame to add texture.
I hope you enjoyed today's post!
Cute ideas, Jennifer! Love it! ( I always wonder what to do with these….)