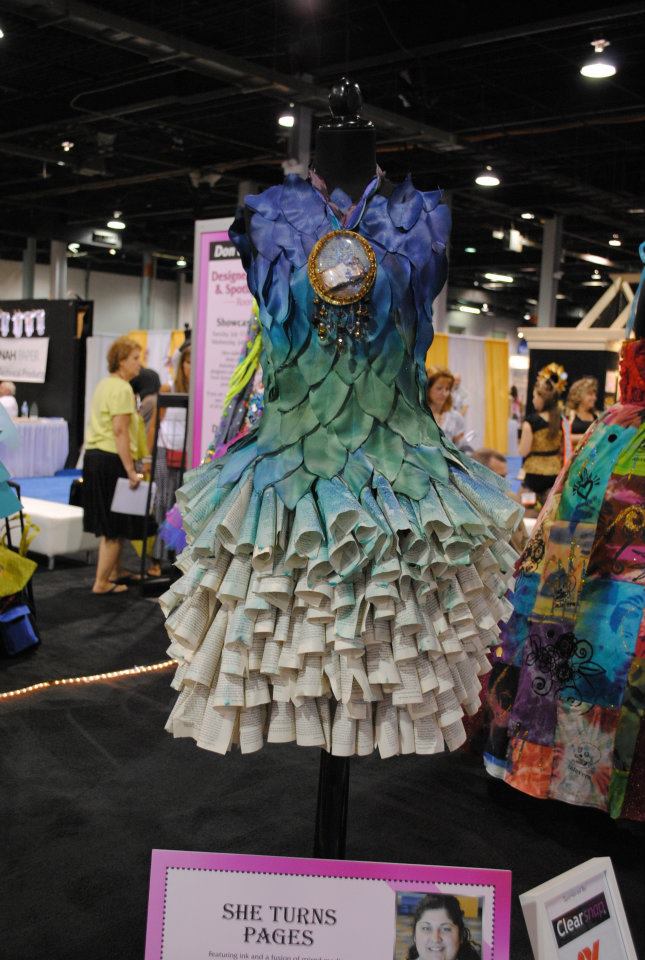
Yesterday I shared with you about the dress I created for the Crafty Couture Challenge at CHA last week. Here she is!
As I made the dress, I snapped behind the scenes photos of the process that I am sharing here with you now!!!!!
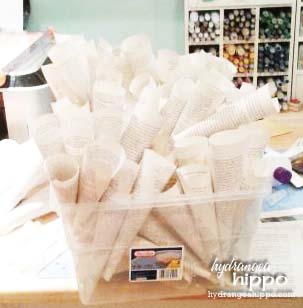
We started with over 1000 pages from Reader's Digest Condensed Books we found on the roadside with a sign that said “free” a couple of years ago. I used a Westcott Craft Knife to cut the pages from the books–it cuts like butter! We used the Xyron Mega Runner to create the cones from the book pages — this worked great!! I am very thankful to Xyron for being one of my sponsors and helping make this dress happen–the cost of getting it to Chicago was more than the cost to make the dress itself!
I started with a $10 navy blue, simple dress from Ross (clearance, baby!). I pinned the sides to make it fit the dress form, which was probably a size 0 — who has a 25 inch waist?! LOL. Since the dress is pinned, I am hoping I can unpin it, and fill in the spaces. It is a medium size dress so fingers crossed that the unpinning works and I can get someone to actually wear it (oh, Elena!!!!!!!!!!!!!!!!!!!!).
I started by adhering the paper cones around the bottom of the dress. Then I built up from there, going round and round the hem of the dress and up the hips to fill in the tubes. We watched half the first season of GCB on Hulu while I glued the tubes.
The next night, I diecut petals from canvas and satin using the Sizzix Pointed Oval Die. I layered the stain petals on top of the duck cloth canvas petals and sewed them together. Then I started from just above the hips on the dress and started adding the petals, layering them until I reached the top of the dress. I folded the petals around the arm holes to be sure to completely cover the navy color dress base.
Next, I put a black plastic trash bag on the dress form to protect it and put the dress back on it. I sprayed the petals with water than started spraying them with Smooch Spritz in Navy Twinkle, at the very top of the dress. The waters helps to prime the fabric to allow the ink to run more easily through the fibers of the fabric. I wanted a drippy runny inky ombre effect and water was key in making that happen. I then worked my way down the dress, adding Smooch Spritz in Splash and finally Emerald Sprinkle. I then sprayed the entire top of the dress with water again to facilitate the running of the ink down onto the book pages. I left it to dry overnight and this is the result:

Clearsnap was also one of the generous sponsors who helped me get this dress off the ground running. The TSA inspected my luggage and managed to mangle the dress pretty badly. I steamed it in my hotel room shower for two days, which then made the ink soak just a tad deeper into the fabric, making it less vibrant. I rushed into the Clearsnap booth at CHA in a panic and they let me try out the brand Stephanie Barnard dye ink sprays — I used Blueberry on the top of the dress and it was perfect!! And it worked BETTER than the Smooch Spritz to give me that amazing,intense color I was after!!! Also, the sparkle from the Smooch Spritz still shone through the Stephanie Barnard ink–I am excited to play with her new inks and see all the amazing ways we can use them.
I also added a necklace I made using lots of my favorite products! I sewed a miniature book to fit inside the globe to go along with my theme of reading–the globe is from GlobeCraft Memories and I just love all the possibilities the globes afford! I added butterflies inked with ColorBox Pigment Queties ink as well as bling from Want2Scrap and then sealed up the globe with some Clearsnap embossing powder in Gold Sparkle. I trhn strung beads on a wire and wrapped it around the perimeter of the globe to give it more oomph. I adhere the beads with hot glue and then sprinkled that with gold glitter to cover any visible glue. Next I strung crystals and beads from Connie Crystal onto eye hooks and attached them to the bottom of the globe in a gorgeous cascade of bling.
I punched a hole in the top of the globe, adding three jump rings through which I threaded various purple ribbons. I then added a necklace clasp and several jump rings along the ribbon strands to keep them grouped together.

I hope you enjoyed this in depth look into my dress and the process that went into creating it! I definitely I had a blast doing it.
Supplies:
- Adhesive – Xyron *sponsor*
- ColorBox Passion Queties Inkpads, ColorBox Fluid Chalk in Chestnut Roan – Clearsnap *sponsor*
-
Smooch Spritz in Navy Twinkle, Splash, and Emerald Sprinkle – Clearsnap *sponsor*
-
Gold Glitter and Embossing Powder – Clearsnap *sponsor*
- 3D Foam Adhesive – Tombow
- Crystals and Bead – Connie Crystal
- Globe – Globecraft Memories
- Stamp – Unknown
- Small Beads – Blue Moon
- Wire – Beadalon
- Die and Diecutting System – Sizzix
- Sewing Machine – BabyLock
- Thread, Satin, and Duck Cloth Canvas – Joann's
- Hot Glue – AdTech
- Bling – Want2Scrap
- Glitter Paper – DieCuts With A View
- Jewelry Findings, ribbon – hydrangeahippo.etsy.com
- Book Pages – Reader's Digest Condensed Books from the 1960s and 1970s
- Butterfly Punches – Martha Stewart
I have no idea what next year's theme will be but I am IN!! LOL I loved this challenge and am just beyond humbled at the response the dress received :) yay!
Would you use any of these materials to make a dress for real? I'd love to hear your take on it!
Author: Jennifer Priest
It started with jewelry, beading, sewing, home decor, painting, basket weaving, pottery, and cross-stitch. Marry that to an entrepreneurial spirit & at 9 years old a girl is selling her wares at craft fairs as far as her parents and grandparents would drive her. These days, Jennifer enjoys crafts of all genres from sewing to scrapbooking to jewelry with a little dabbling in the mixed media world. Her style is approachable and she wants everyone who sees her work to feel that they too can embrace creativity and make their home and life beautiful.


this is just gorgeous. so much fabulous detail.
Totally enjoyed seeing the process…I might attempt one next year myself
WoW! This is way beyond my creativity level and absolutely beautiful. From the design to the final color, it is amazing! Congratulations to you on such a fabulous work of art!
you did a super great job!!! Your humility will exalt you to bigger and even better things:)wow–very lovely and tons of time:) thank you for sharing and allowing me to glean from you;) How did you even find out about the contest?? be blessed
~Beyond Measure
Tammy
http://www.urbeyondmeasure.com
Thank you for the compliments!!
Tammy, the challenge is open only to Designer Members of CHA. We get an invitation to apply with our idea about 3 months before the trade show and from those applications, they chose only 16 to move forward. Would be amazing to see you create a dress next year!
It is wonderful….and even better looking in person! Congratulations on a beautiful presentation!
wow…I was wondering what to do with my old lamp shades and I now have a great Idea …I love the dress but a size 20 would be too much for me ….your way ahead and on the trail of greatness…good luck to you in the next project
Simply stunning!