Ever thought about making jewelry for Halloween? It is one of my fave holidays of the year, not because I like scary things but because I like the messy, grunginess of it all. All things are allowed! Make a mess, get splatters all over, and distress things and it is all okay because you can just say it is “spooky”. I really enjoy making decor for my home, making the kids' Halloween costumes, and carving pumpkins but this year, I thought it would be fun to deocrate myself with a piece of Halloween themed jewelry.
I recently started getting braver with ICE Resin since I became their Social Media Manager in July. Yes, I had used it before but there is nothing like being surrounded by creative people like Susan Lenart Kzamer, Jen Cushman, and the ICE Resin Creative Team to really spark your creativity and inspire you to push yourself beyond your comfort zone.
This piece was all about getting outside of my comfort zone and try techniques I had admired others do from afar. Have you ever challenged yourself like that creatively?
Here are some of the techniques I used on this piece:
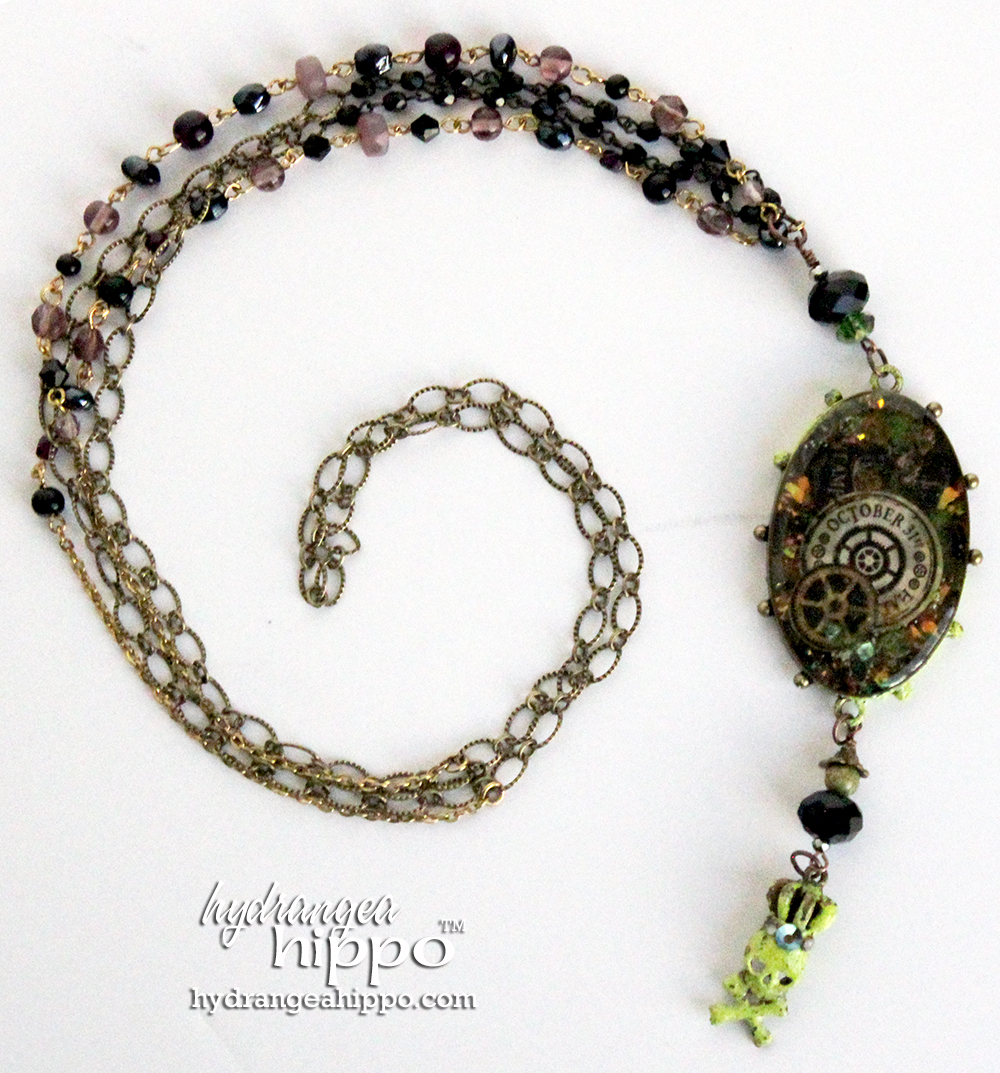
- To get the green on the edges of the bezel, apply ICED Enamels adhesive to the bezel and then dip into ICED Enamels. Use a heat gun to set. Then seal with ICE Resin.
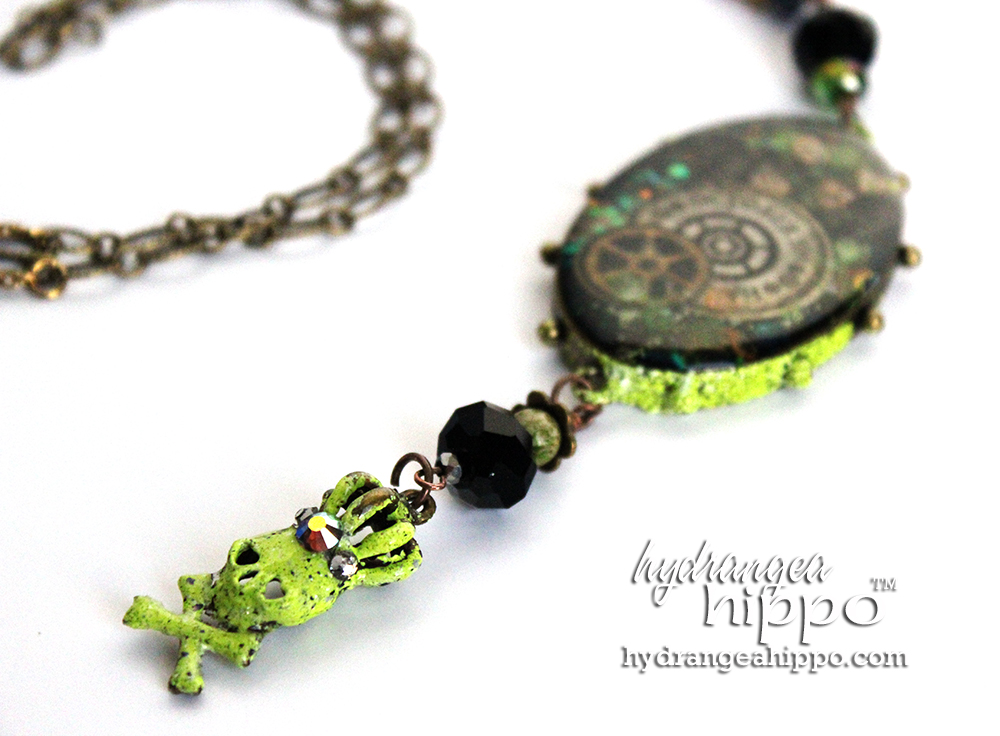
- To color the skull charm, apply a thin coat of ICED Enamels adhesive to the charm and then dip into ICED Enamels. Use a heat gun to set. Then seal with ICE Resin. You can do this with ANY metal charm – now you can go with ANY color!. While the ICE Resin was tacky on the skull charm, I used the Crystyler 20 to apply one 20ss crystal to the center of the skull's crown. Then I used the Crystyler 12 to apply one 12ss crystal to either side of the 20 ss crystal. ICE Resin works as an amazing adhesive for crystals on jewelry pieces.
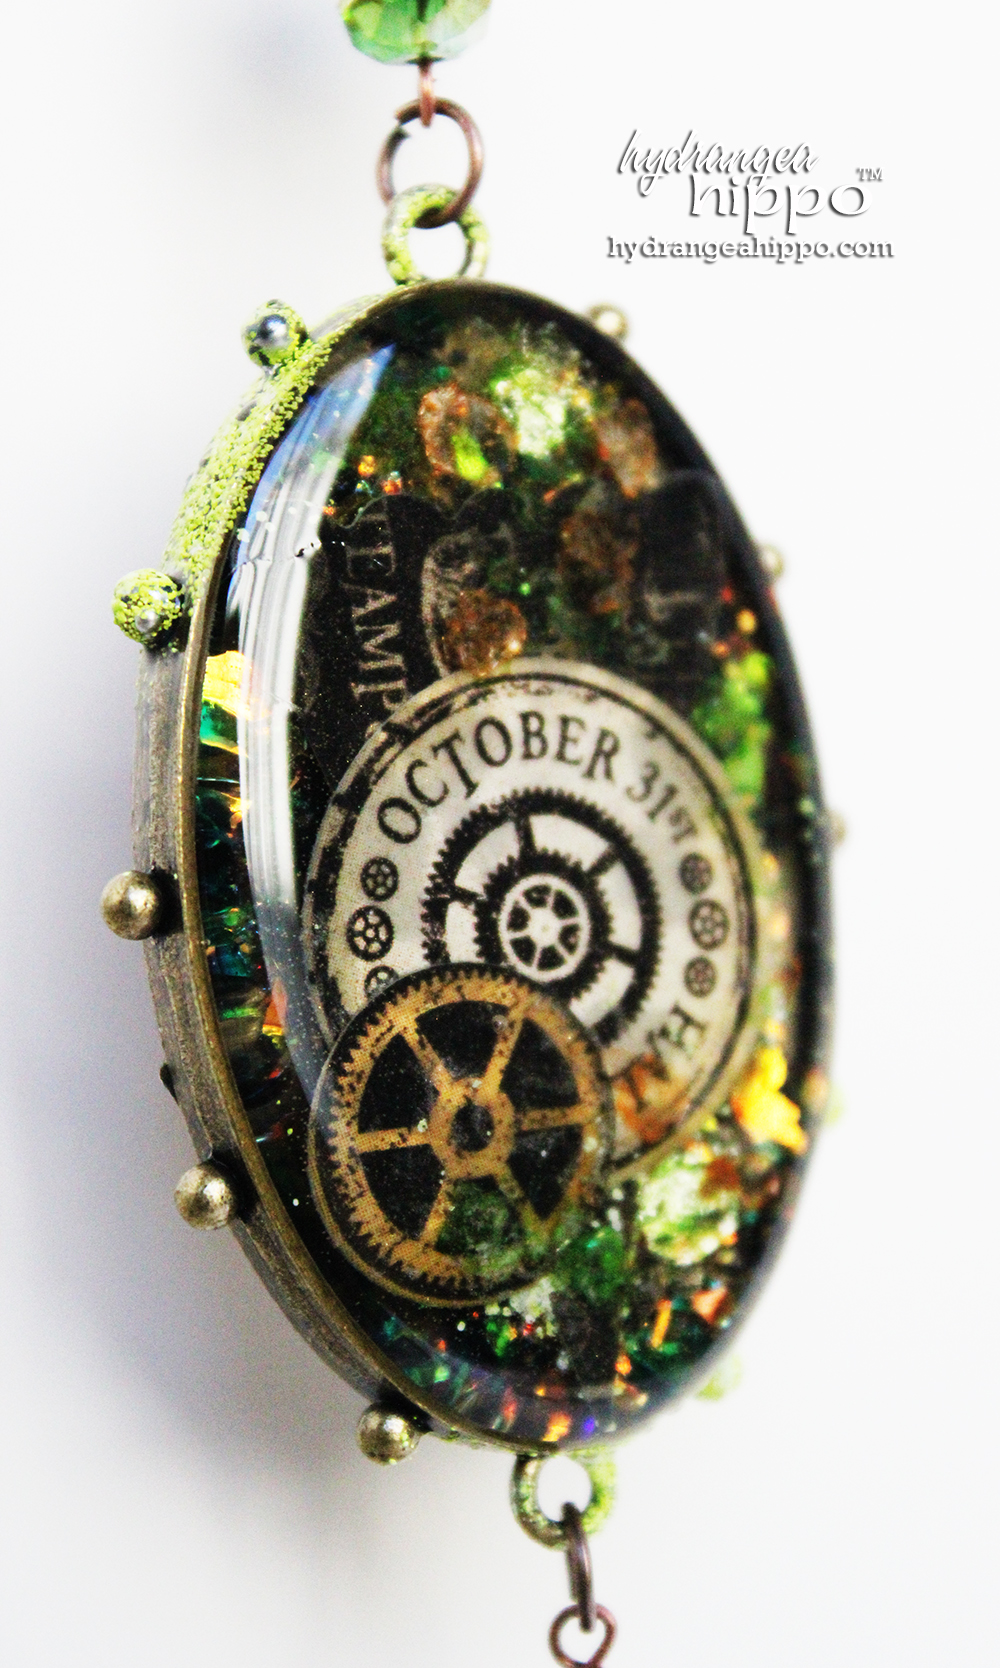
- To achieve the layered look inside of the bezel, I sprinkled Shattered Fire Opal Mica into the bottom of the bezel and I applied a thin layer of ICE Resin to coat, filling the bezel about half way. Then I allowed it to cure overnight. The next day, I added Graphic45 diecuts that I sealed with ICE Resin Paper Sealer. I also sprinkled moreMica Flakes across the diecuts and then added a final layer of ICE Resin. I allowed it to cure for 72 hours.
Supplies:
- ICE Resin
- ICE Resin Art Mechanique Hobnail Oval Bezel by Susan Lenart Kazmer
- ICE Resin Shattered Fire Opal Mica
- ICED Enamels
- ICED Enamels Adhesive
- ICE Resin Art Mechanique Ephemera Pack
- ICE Resin Paper Sealer
- ICE Resin Chain and Rosary Chain in Black
- Crystyler 20 by Norma Rapko for Walnut Hollow
- 20ss Preciosa Crystal
- 12ss Preciosa Crystal
- Graphic 45 Steampunk Spells Paper
- Skull and Cross Bones Charm
- Chain
- Eye pins
- Jump rings
- Jeweler's Pliers
- Heat Gun
- Rosary Chain
- Assorted Faceted Beads
- Czech Glass Beads
I created this project during the Google Hangouts On Air I was a part of with ICE Resin for #CraftingTheEmmys a couple weeks ago. Watch the video here (the sound is rough in spots but it gets better):
I hope you enjoyed today's post!