I have used etchall® Etching Creme for years — it is the gold standard in my book! Celebrating 80 years, etchall® is made in the USA. It is so wonderful to find a truly amazing product, that is easy-to-use and provides jobs here in the states!
About 5 years ago I got my first Silhouette Electronic Cutting System and started cutting paper, vinyl, and all kinds of fun materials. Then, a local scrapbook store brought in etchall® Etching Creme and shared with me how to use cut vinyl with the Etching Creme to create patterns, words, and designs on glass. I was in love but intimidated. I came home and sat on the bottles of Etching Creme for over a year. Shameful, I know!
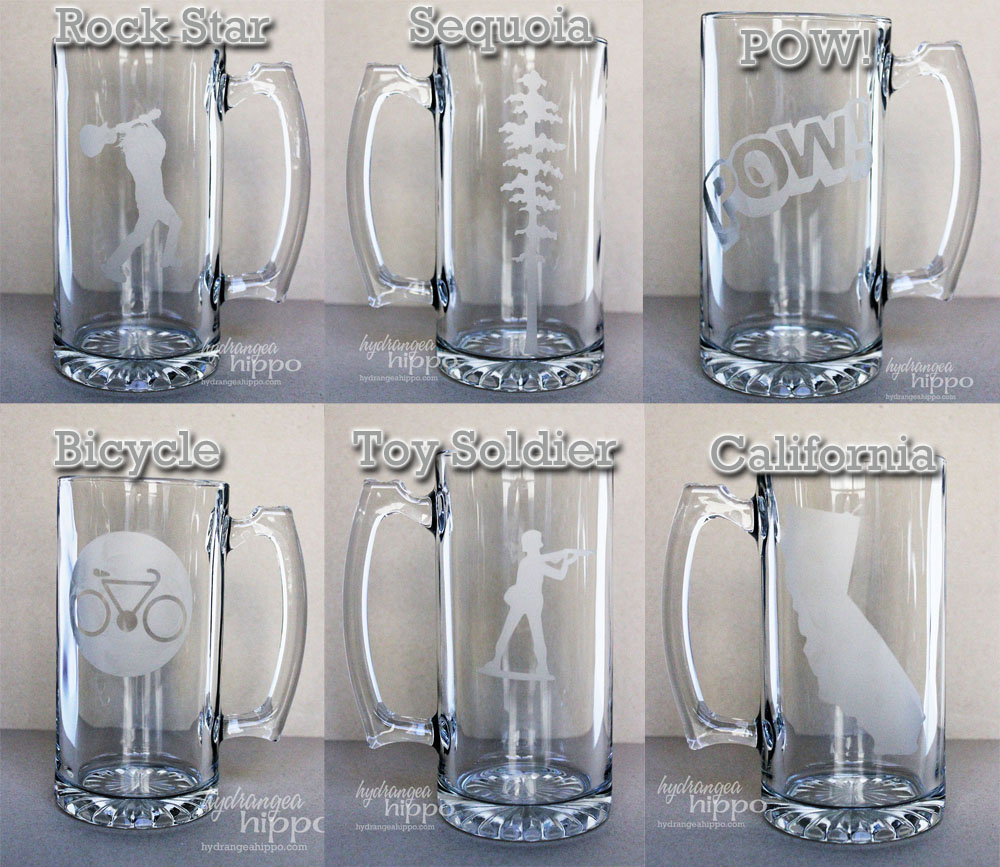
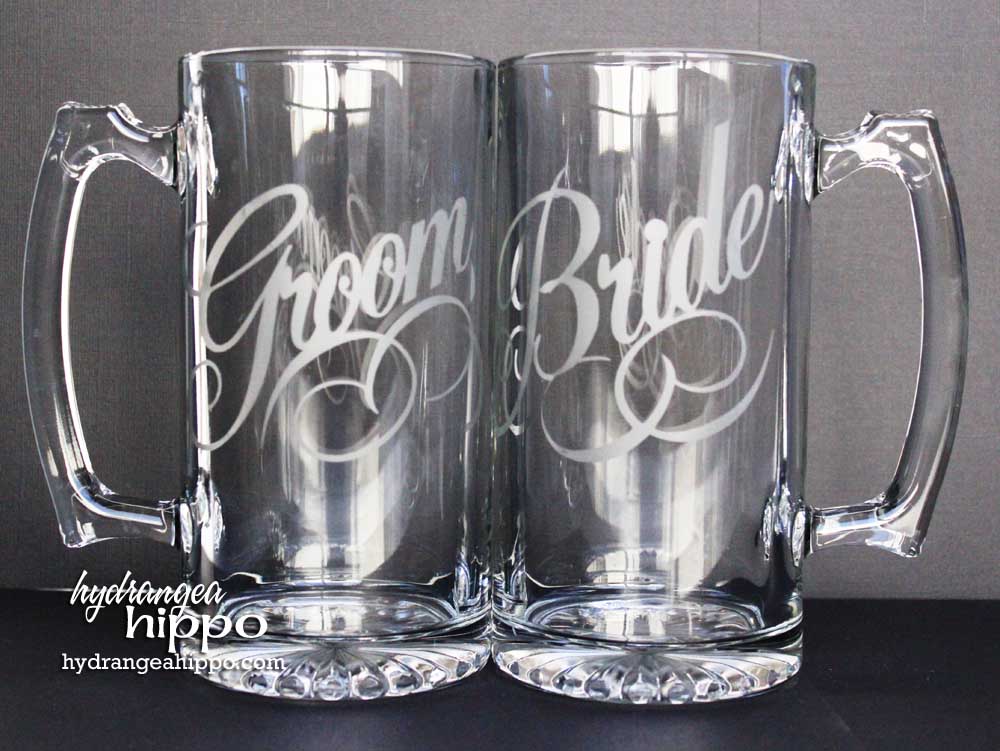
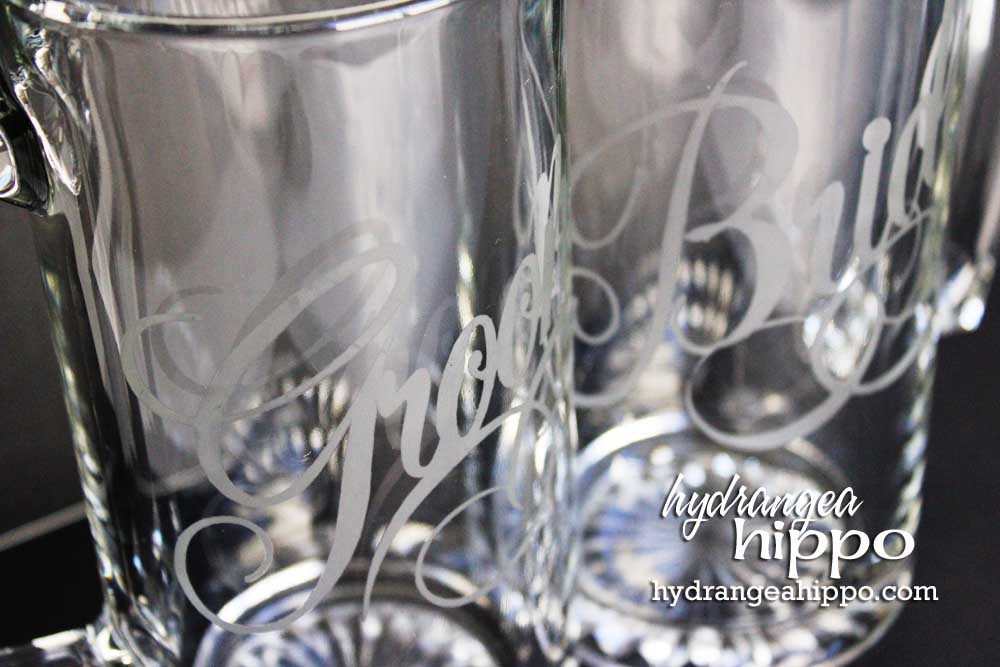
Finally, I got the courage to try the Etching Creme out. Guess what? It was so super easy to use. Plus, since the creme is reusable, it lasts forever – etching gifts costs pennies on the dollar when compared to using a service to etch them for you. I was seriously bit by the etching bug and have been etching gifts and home decor items around my home ever since. Two years ago, I made custom etched beer mugs for my dad and brother-in-law using etchall's Etching Creme and stencils I cut from vinyl with the Silhouette (above). They were a hit! Last year, we brought them into our etsy shop, including sets like this fun Bride & Groom pair:
Today I am sharing how to give an old, scratched glass top table new life, in this tutorial featuring etchall®‘s Etching Creme:
Altered Table
I have had this table for about 10 years and it has moved with me 4 times! In that process it has been scratched, dented, stained, and weather beaten. Most recently, croppers who have come to my house have been using it as a Smooch Spritz table! Despite how bad it looks, I have kept it around because it is sturdy and I like that it folds up.
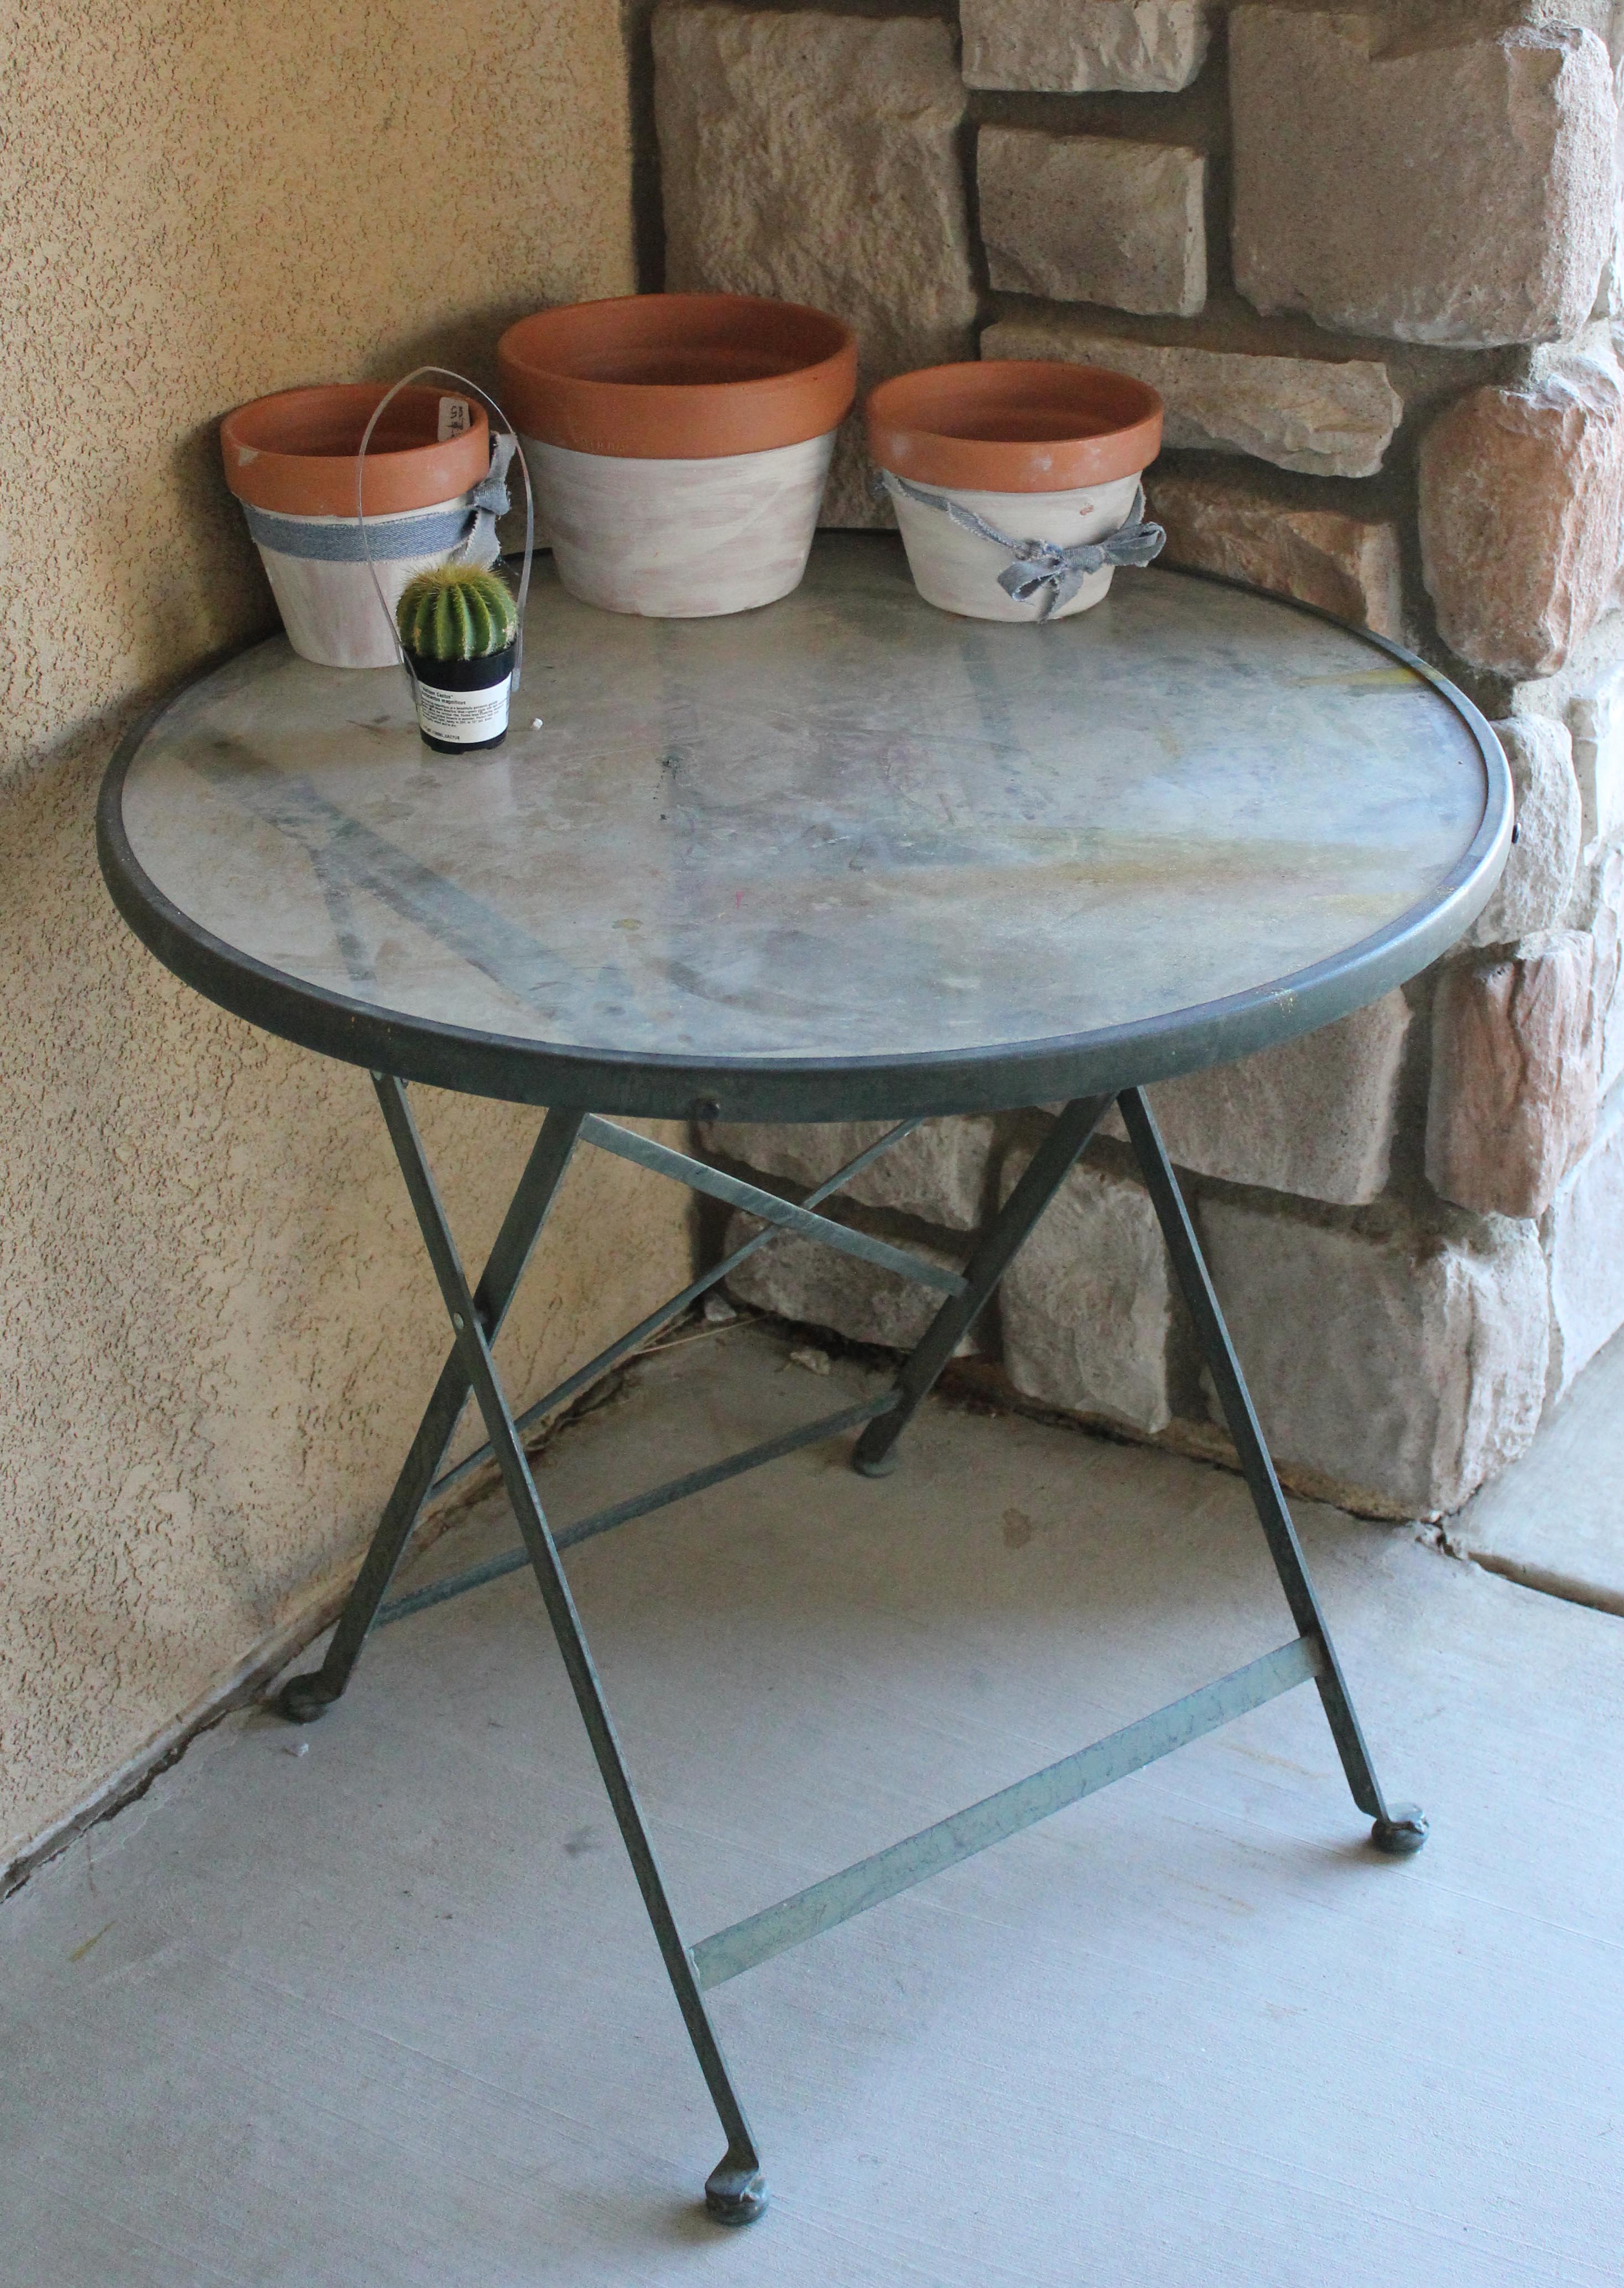
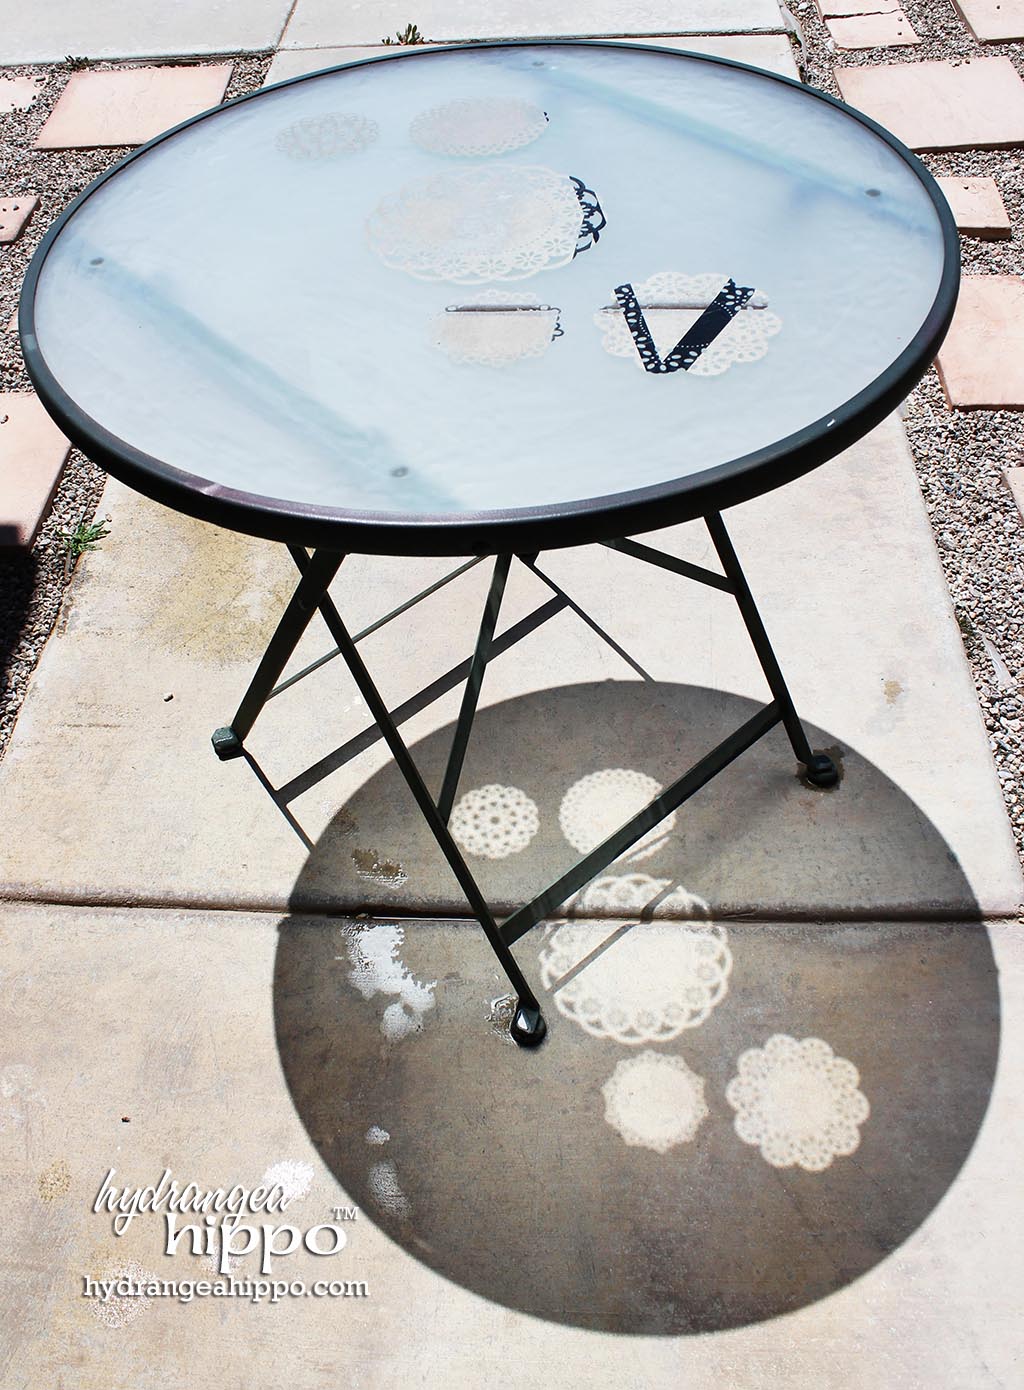
I wanted to use the table as the centerpiece for a bistro set on my front porch but it was just too ugly. I decided to etch the top of the table in order to hide the flaws and create some visual interest. This same technique can be applied to any patio or dining table — rethink those excellent thrift store tables by adding an etched glass top!
Supplies:
- etchall® Etching Creme
- etchall® Squeegee
- Latex Gloves
- Glass Top Patio Table
- Silhouette Cameo® Electronic Cutting System
- Silhouette Vinyl – Outdoor
- Silhouette Transfer Tape
- Hose with Sprayer

I cut 5 different doily patterns from vinyl in Silhouette Studio. Doilies and all things vintage are really on trend right now so this was a great way to update my table without spending a lot of money for a new one. Take that, Anthropologie!
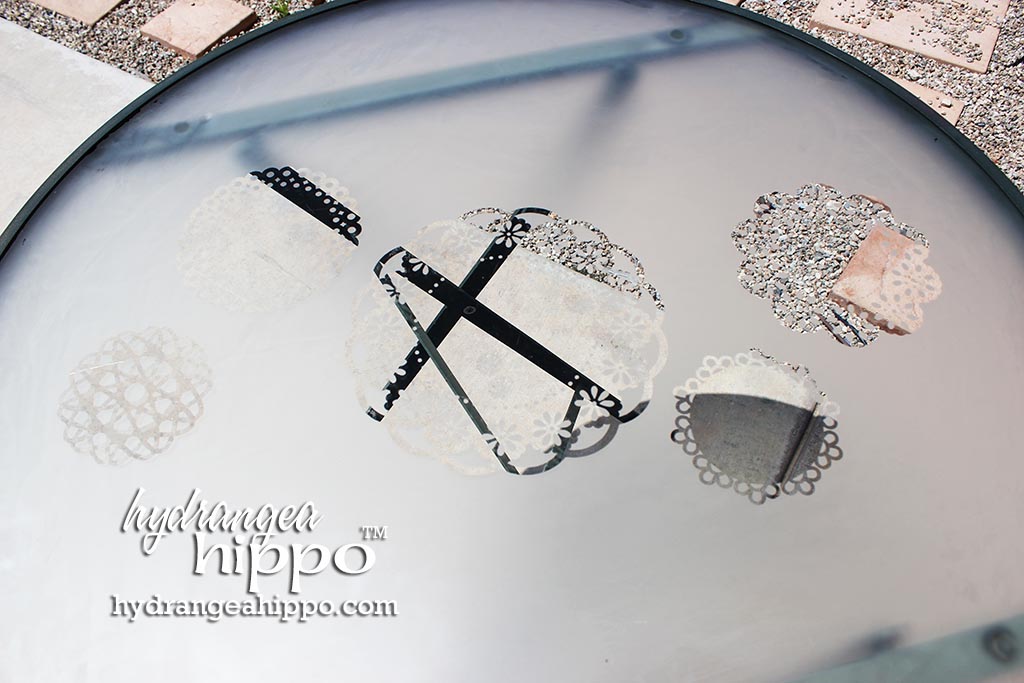
After cleaning the surface of the table really well, apply the vinyl doilies to the table top. If using one doily or creating a pattern, find the center of the table to make sure your design in placed in the center. Measure from right to left and mark the center and then measure from top to bottom and mark the center. Where the two lines intersect is the center of the table. Erase the lines and use a dot of permanent marker to mark the center. Apply the vinyl doilies to the table as desired, pressing down with a credit card or plastic squeegee to make sure the vinyl is pressed securely against the glass. If there are bubbles at the edges of the vinyl, the Etching Creme can seep under the edges and make the image appear less crisp.
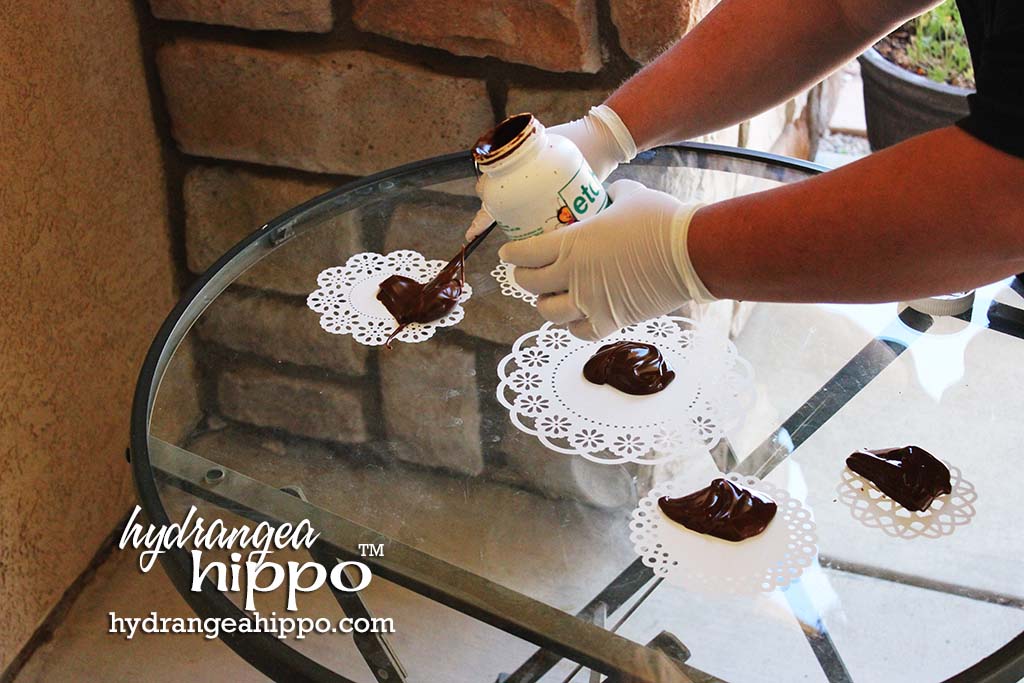
Apply etching cream over the entire surface of the table and let it set for 15 minutes. Be sure to get into all the nooks and crannies of the vinyl doily designs with the etching creme – every detail will stand out once the creme works its magic. Don't worry about using too much!

I like to use a plastic knife or baking spatula to spread the Etching Creme over the project. For a project of this size, you can also use your hands. Be sure to mark any cooking utensils that you use for Etching Creme as they should not be used for cooking – Etching Creme is a chemical process so I would keep the tools separate from your regular cooking utensils, just to be safe.
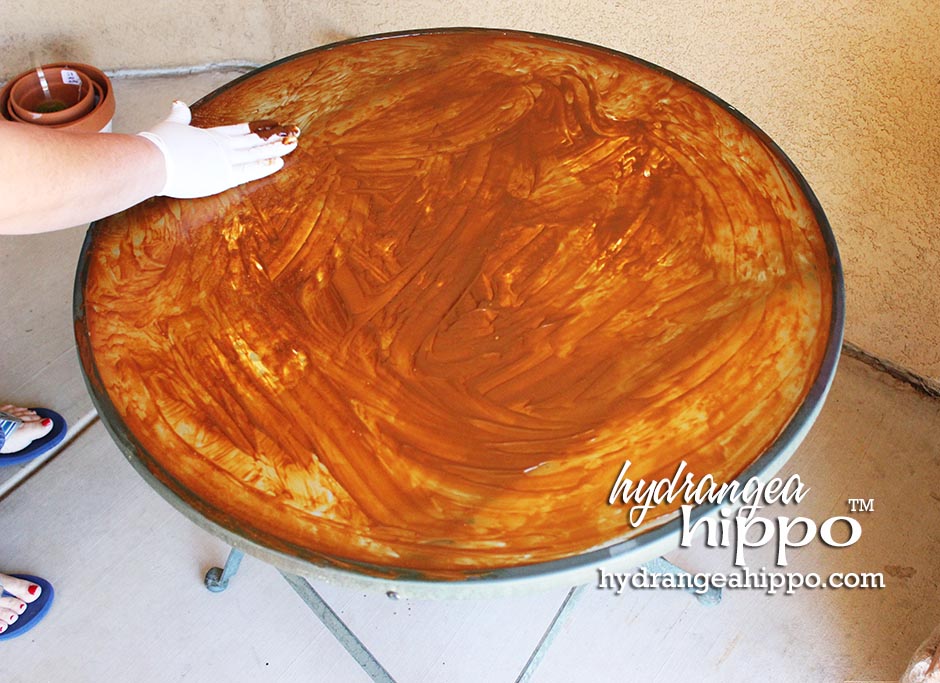

After the table top has been covered with the Etching Creme, immediately use the etchall® Squeegee (or a plastic gift card) to scrape the creme off of the table top and place it back inside of the tub. It can be reused on another project so save as much of the creme as possible before cleaning the table top.
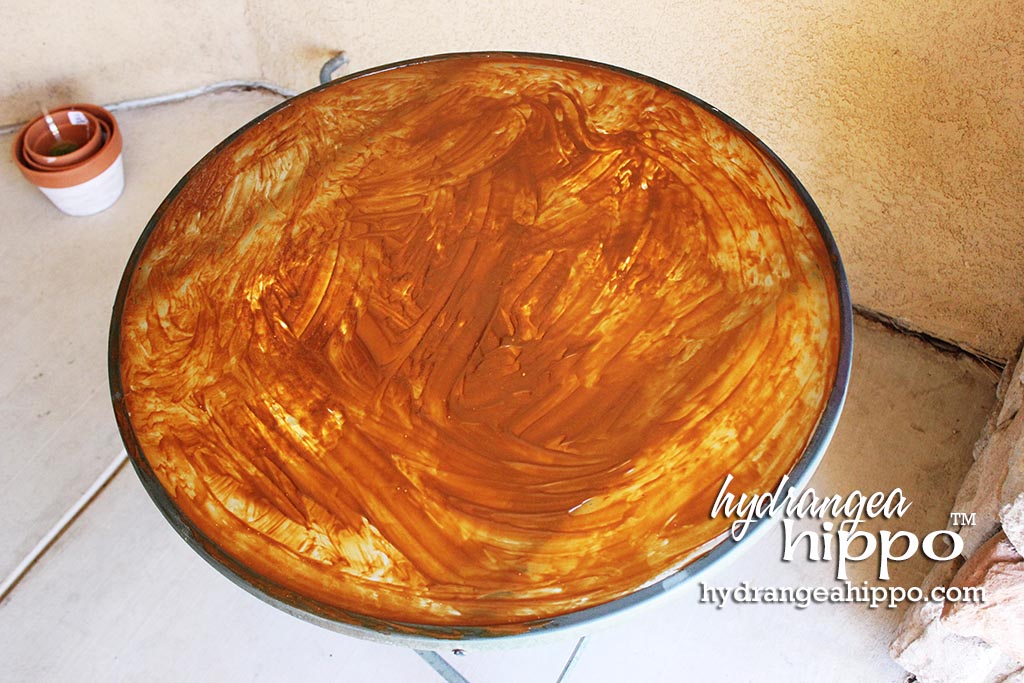
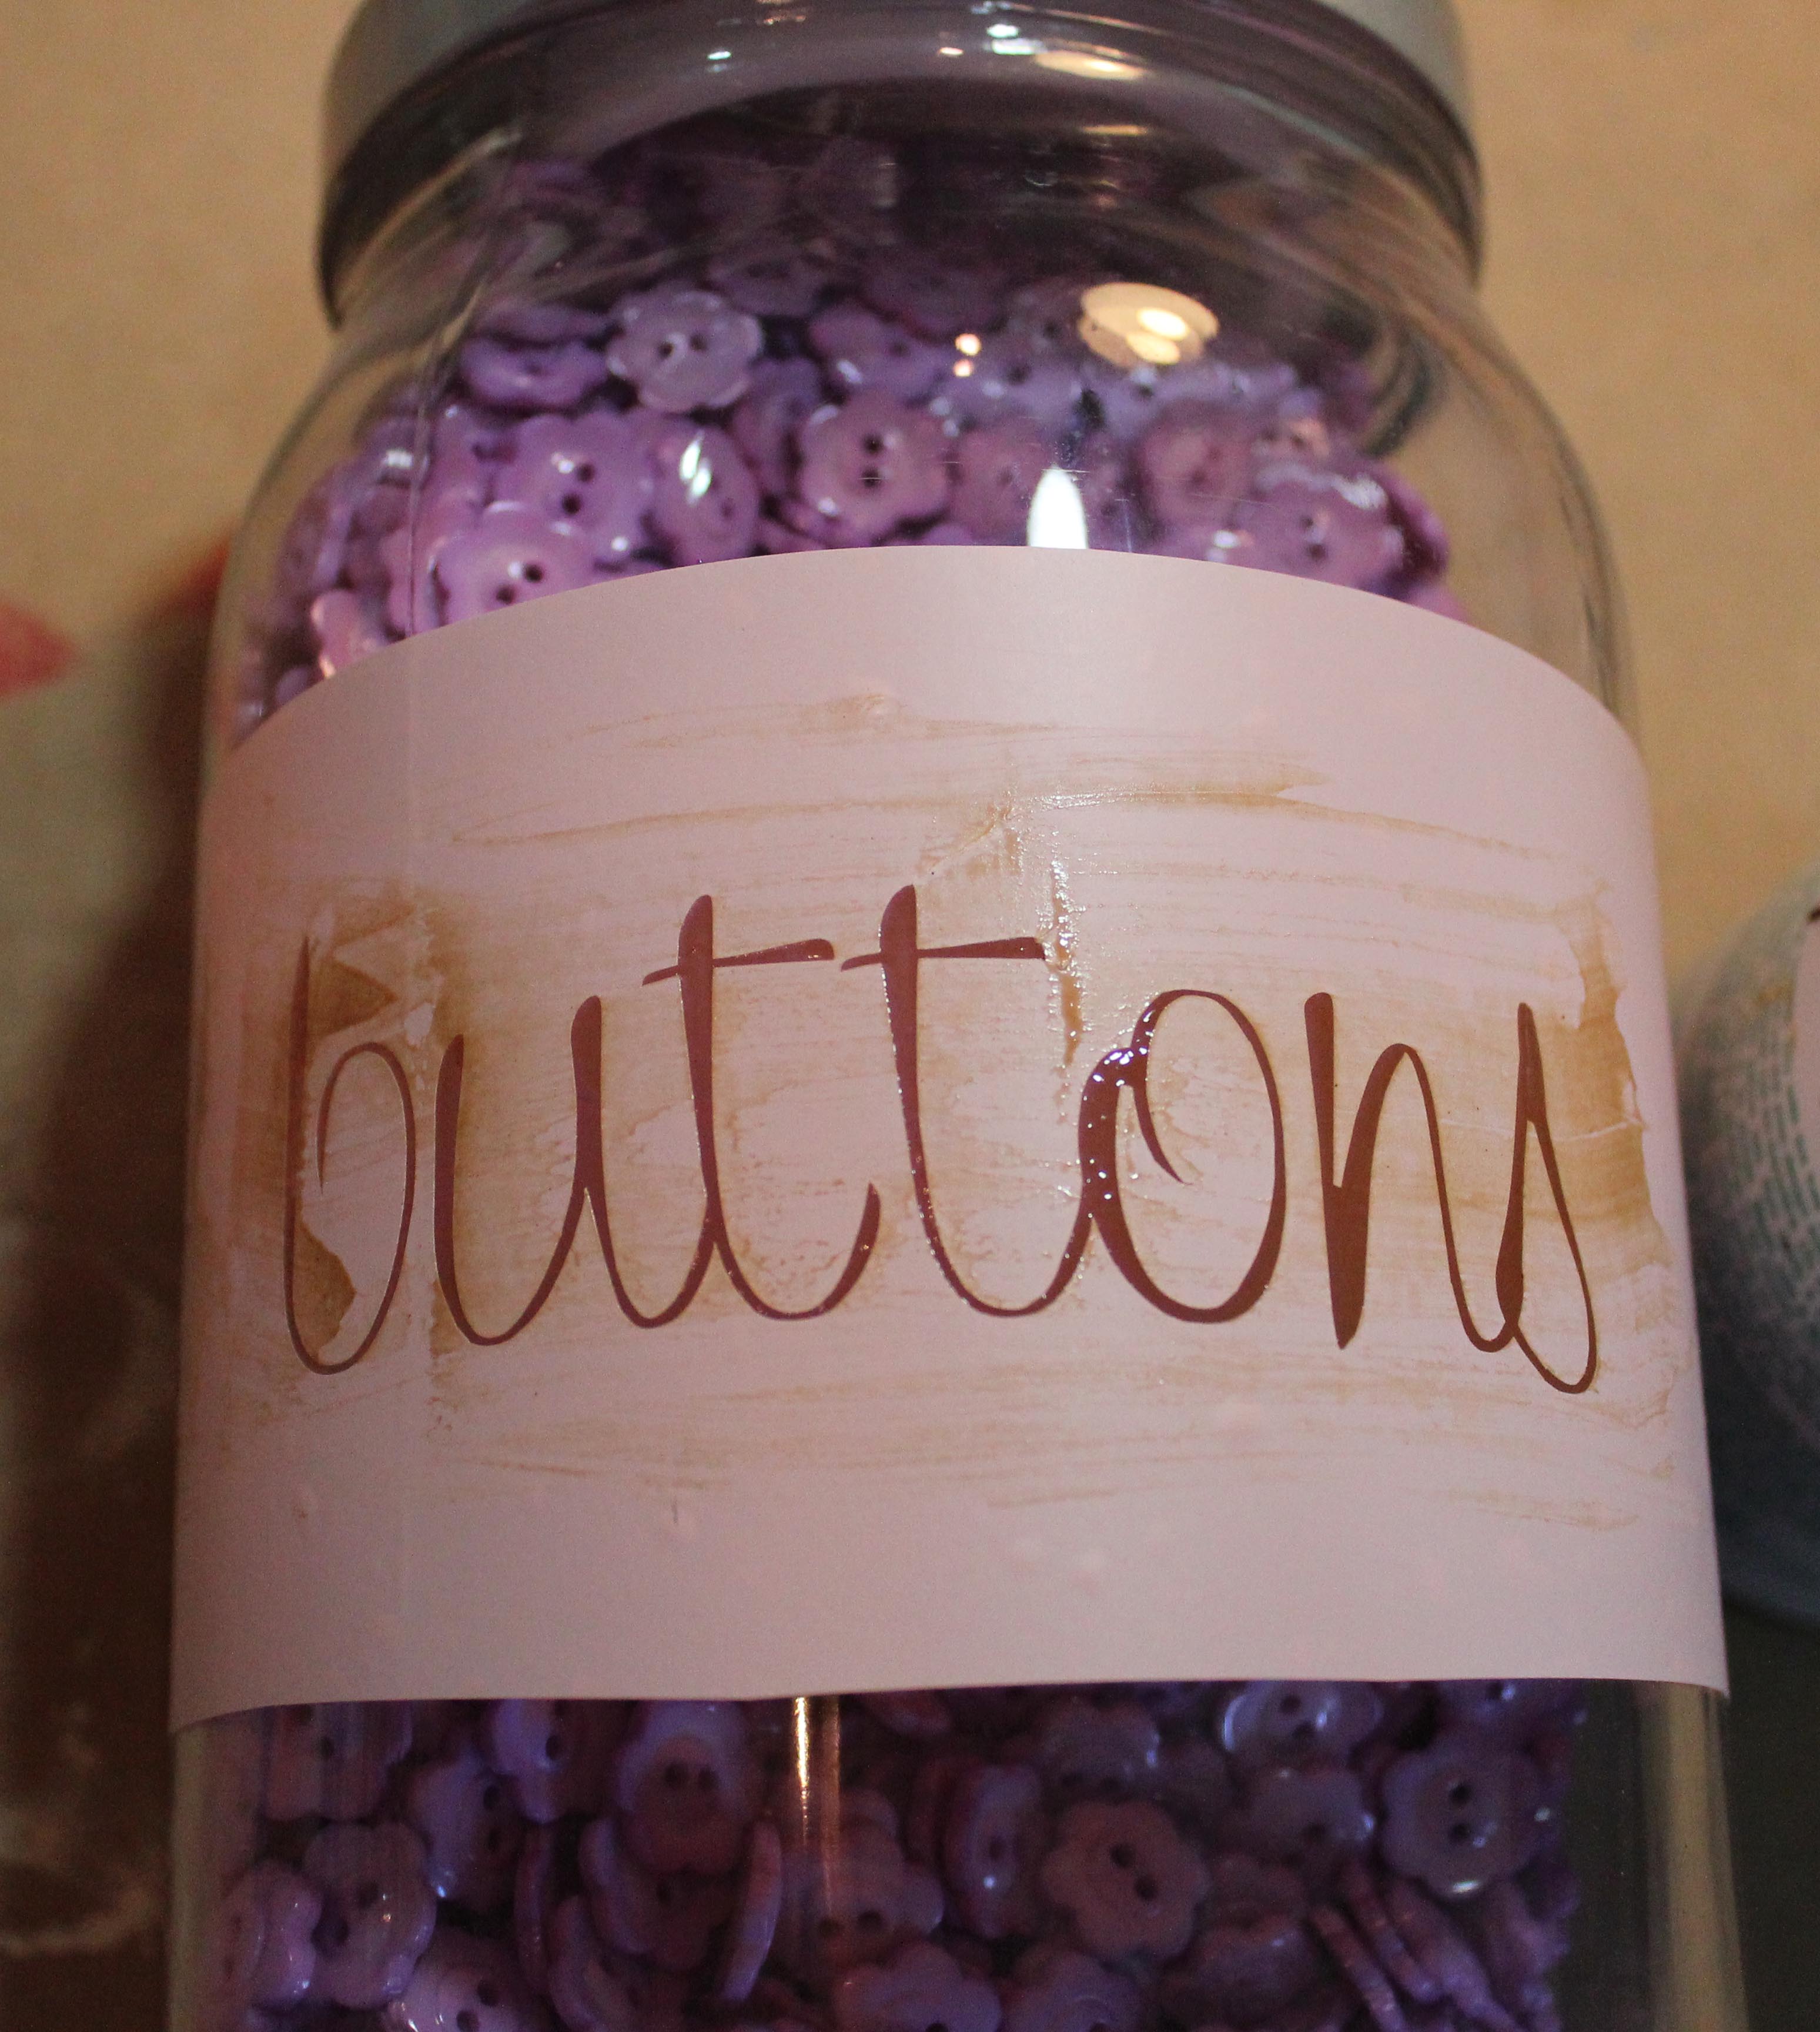
After all of the excess creme has been removed (it will look like there is very little creme on the project, almost as if it has a haze on it), set a kitchen timer for 15 minutes. This button jar project shows what the scraped etching cream over vinyl will look like:
After 15 minutes has passed, wash the table top off with a hose and sprayer to wash away the remaining cream. If doing this project outside, like I did since it was so large, be sure to keep the project in the shade. If you live in a particularly dry area, like the desert, the hot sun can dry the creme out before it has a chance to work its etching magic.
Peel away the vinyl to reveal the etched pattern. Instead of using the vinyl as a stencil, I had used it as a mask, to cover the parts of the table I did not want to etch. I plan to remove the glass top and spray paint the base white. But that’s a project for another day!
It is incredibly difficult to get good photos of glass but in this photo, the sun shines through the table top and shows the pattern from the glass etching in the shadow of the table:
Fun, huh? I hope this project inspires you to try etchall® Etching Creme for yourself. You can create patterns using stencils, punches, or by hand-cutting (with a craft knife) a pattern from a scrap of vinyl. Also, the etching creme can be used to prep surfaces, like ceramic plates and tile, for painting after they have already been glazed and fired. Please check out the etchall® website (click their name in this post) to see more project ideas. And, don't forget to use this handy dandy widget (below) to see the other blogs in this week's hop, as we shine the spotlight on etchall®!
Thanks for stopping by!
Hey Jen! Your table looks awesome. I just tried cutting vinyl yesterday on my Cameo, sad I know. Now i’m hooked. I’ll have to try the etch all next. Awesome job!!
Melisa
Hello, please contact our etchall’s office at 623-933-4567 or [email protected]…Thanks & God BLess…Barbee…<
Wow! What a beautiful transformation! Thanks for the fantastic tutorial.
LOVE IT, what a great project!
LOVE this idea!
Absolutely love what you did with the table! I have a table at our vacation home that you have inspired me to make into a masterpiece. Thank you!
LOVE this, Jennifer – beautiful projects!
I love your table, it is a cool project.
The table is Great! I love how you just got down and messy. You made it look like fun! The result and pictures are wonderful! Everyone loves personalized gifts, and thank you for showing some of the other ideas to etch and the tools that can be combined to make them. Thanks…Barbee… <
Do you sell the Bride/Groom beer mugs anymore?