In 2012 I made a goal to start making YouTube videos. I had no idea what I was doing but I knew the most important thing to do was to get started. Like anything that someone gets good at, they have to practice and practice and practice some more.
I get asked all the time about my set up – it allows me to shoot videos from overhead, giving a bird's eye view of the action on my craft table. Over the last couple years, I have gotten advice from fellow YouTubers, like Tanner Bell of A Little Craft In Your Day or Liz Hicks, attended conferences, and read blogs and searched out tutoriuals to learn how to shoot and edit my videos. They are still a work in progress but if you look at my first video and compare it to the videos I make now, there is a noticeable difference and evolution. The same will happen when you start and continue making craft videos – they will get better over time.
One of the biggest issues when filming craft videos is lighting so let's start there:
Lighting:
I have an issue with lighting in my current studio space. The tables are immediately under can lights which makes my camera rig cast a shadow on the table (like in this video) that was driving me nuts.
I don't have any windows that get good direct light (one faces north and the other faces north west) so it is already kind of a dark room in general.
The big kick in the pants was when a big website said they would love to work with me on videos but my lighting needed improvement. Argggh! I looked online for lights and since I have no idea what I was looking at, and the prices were all over the place, I got really overwhelmed. I talked to my friend Tanner Bell about this situation and got some great advice – he told me about a softbox lighting system he got on Amazon. I bought it right away (it is even more affordable now) and it has worked wonders! Here's what it looks like (click the photo to check it out in more detail):
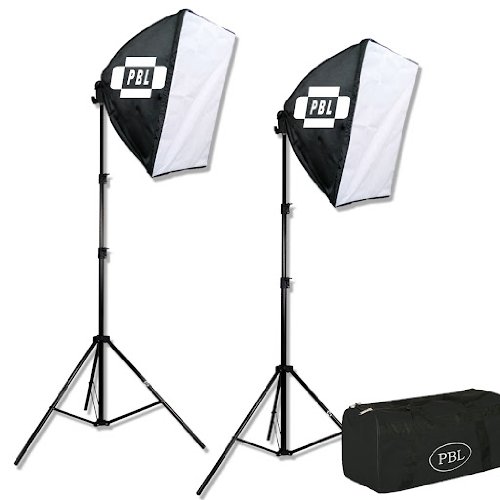
After I got the lights, my lighting improved a lot. But I still had the shadow problem with my camera rig. I recently moved where I shoot videos to another table and removed the can light above the camera rig – problem solved! I also moved one of the softboxes to cast light from behind me and one to cast light from the opposite corner, in front of me.
I attended a session at NMX with Caleb Wojciki of fizzle.co where he shared about lighting and learning how to position the boxes to not get shadows. He also said you need 3 softboxes – some day I'll get another.
Here are some other quick tips I have collected over the years:
- 3 sources of light
- Try to use natural light, like a big window. You should face the window, not stand in front of it because you will cast a shadow on your project
- Position one light at 30 degrees from your left, the other light 45 degrees to the right of that, and keep them at 75% power
- Use a softbox or umbrella to diffuse the light so you don't get hard shadows
I hope this post helps you with lighting for your video shoots.
Subscribe to our newsletter and follow us on Facebook for more crafty goodness!
This post contains affiliate links from which I make a commission when you make a purchase. Please do not feel obligated to buy – but I do appreciate if you find something here that you need or want and buy it through my link. Thank you!
Funny that you should post this. I am trying to get better videos done. At the moment I am doing the Snapguide step out photo option as video is such a pain.
Thanks for sharing all of your know how about making videos. I have not made one yet, but would love to learn. Are there any websites that strictly talk about this from the very start? Thanks for your help.
Great post, but several of your photos say they’ve been removed from Instagram. I’d love to see these images. Is there a way to put them back into your blog post?
I’m starting a blog and making craft tutorials so I appreciate you sharing your knowledge.
Thanks,
Margie
mimimakes.com (will debut this fall!)