

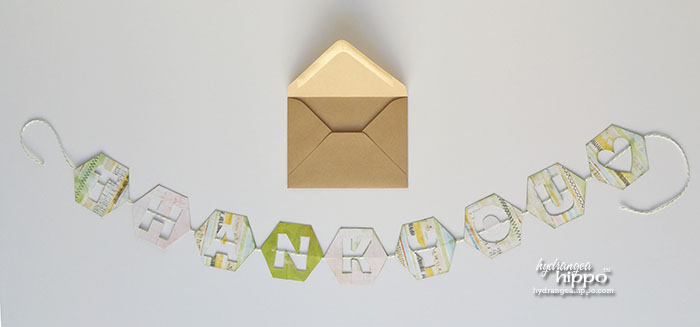
Do you love sending “happy mail” to friends but wonder how to make your cards more useful? You know I am all about practical crafts and while I LOVE a gorgeous greeting card, after you get so many of them, they get kinda hard to display. Today I’m sharing how to make a miniature garland to send instead of a card or inside of a card! This banner can be displayed in an office or on a wall for months to come and folds up for easy storage after the holiday or event is over, lasting much longer than a traditional card. I created this fold-up paper garland with diecuts that can be used to brighten anyone’s day.
Where do ideas like this Mini Banner come from?
I was inspired by this “Love Letter On A String” that CraftyChica made a few days ago and thought that I could totally make a banner version of it with diecuts! I love the way the doodling looks on Kathy's project but I also like the string going through the middle of the diecut letters on mine. You can combine both projects and doodle on your banner after you diecut it!
To create your own mini banner, you’ll need the following supplies:
- Sizzix® eclips® 2 Electronic Diecutting System
- Sizzix eCal Lite Software
- Sizzix Hexagon Shape
- Berlin Sans Demi Font
- Laptop Computer
- ColorBox® Chalk Ink in Mint (or color to match your paper)
- ColorBox® Stylus & Tips Set
- 2 Sheets of Patterned Paper – this is from Bo Bunny Press
- Twine
- Adhesive Tape Runner – I used a Tombow MONO Adhesive Dots Runner
- Envelope
How to send this paper garland in the mail:
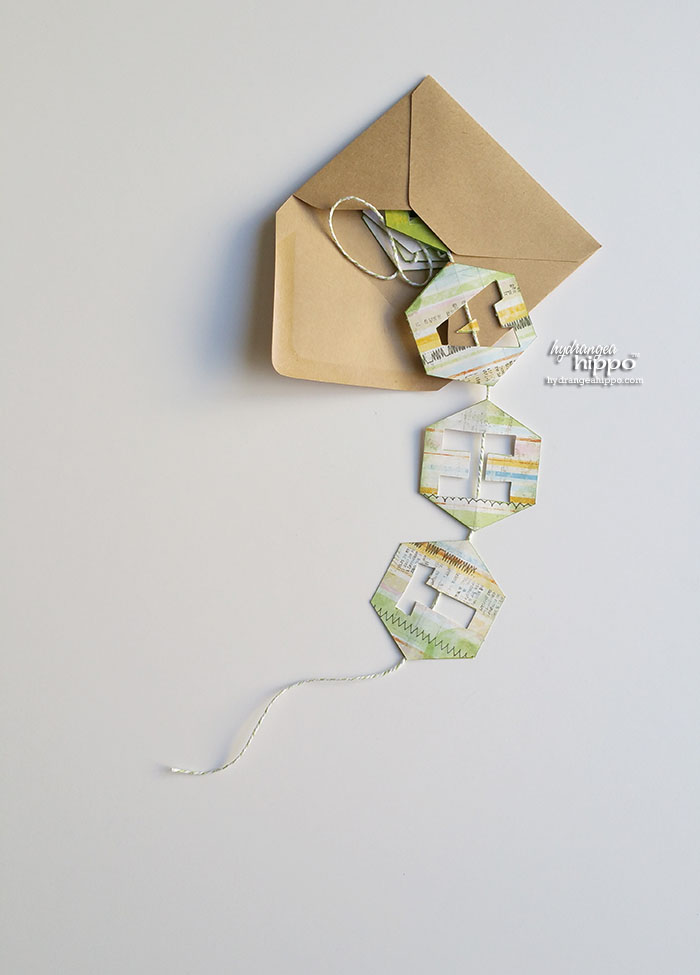
To send this garland, you simply need an envelope! Fold up the banner between the each piece and insert into an envelope. If there are a lot of letters or you used thick twine like I did, then you might need to add extra postage due to the thickness of the envelope. You can also insert the banner inside of a card and now they get a bonus banner when they open it all up! How cute would this be to get on your birthday! Or if you were sick, wouldn't it be sweet to receive a “get well” or “big hugs” banner?
I made a handy dandy video to share how to create this garland with paper from start to finish. Watch the video below and don’t forget to subscribe to the Clearsnap YouTube channel to see more:
What message would you send on a mini paper garland to a friend today?